Piano Moving

Moving a piano is a pain. I’ve moved a lot of pianos myself, and I’ve paid people to move pianos for me and here are some tips I have on the subject.piano_moving

1. It’s usually worth it to hire professionals

It is spendy, but I think hiring professionals will be be faster and cheaper (if you count your time) compared to doing it yourself. If you’re moving within the Portland area, most movers are going to charge $150-$250 (depending on location, situation and number of stairs involved).

Here are some numbers for when I moved a piano last:

  1. Rent a U-Haul Truck – $100
  2. 2 hours to pick up and return a piano dolly from a friend
  3. 3 hours of my time and 2 hours of a friend’s time moving the piano
  4. $5 for donuts to thank helpers

Valuing time at $20 per hour, that comes to $245 and a lot of pain (imagine two 150lb guys pushing a full-size upright out of a basement and up a frozen hill on a sheet of plywood)! I could have paid movers $150 and they would have done it faster, safer and and I wouldn’t have had to spend my Saturday morning working on it! If you make a mistake and the piano lands on your leg or arm, you pay the doctor bill and 8 weeks of productivity!


2. If you’re going to do it yourself, do your research and prepare well.

Know your piano. Measure it and compare those measurements with the space you will be moving into or through. Know approximately how much it weighs and how many people you will need to lift it. Two strong men can handily lift a spinet or small console, but you’re moving anything bigger, or moving it far without a good dolly, you will want four men.

If you have steps to move it up or down, have a plan for getting through them. Don’t rely on the piano’s wheels to roll it. Most piano wheels are very small and not made for rolling more than a few feet at a time. Use a dolly whenever possible. It is much easier on the piano and on the movers. A run-of-the-mill furniture dolly will work for many uprights, but try to get something bigger with larger rubber wheels if possible. The small wheels on furniture dollies don’t go over doorways very well, and are not very easy to turn accurately. Securely cover and protect your piano. You can very easily damage your piano and the repair bill for a couple dings or scratches can easily be higher than what you might have paid professionals to move your instrument. Cover the piano with thick blankets if you can, leaving gaps to reach important handles and handholds.

Don’t use a pickup. Lifting a piano into the bed of a pickup without a ramp is not only very difficult, but unsafe. If not tied down very securely, the piano can tip out of the bed which is not good for the car or piano!

pianopickup

3. Don’t move a grand yourself.

Grand pianos are even harder to move since you have to take the legs and pedal lyre off and turn the piano on its side to move safely. Grand pianos should be wrapped in blankets or shrink wrapped for protection and strapped tightly so the lid doesn’t open while moving. If you have to navigate any stairs with a grand, a “piano skid board” is a necessity. I strongly recommend you hire professionals to move a grand piano, but if you want to do it yourself, here is a video that shows how to break down and move a baby grand piano.


grandpianomoving


Here is a list of the professional movers in the Portland area in order of my recommendation:

  1. West Coast Piano Moving  –  I have worked with them several times and they do great work. West Coast does the moving for Portland Piano Company
  2. A to Z Moving  – A to Z Moving works closely with Classic Pianos in SE Portland and I have had good moving experiences with them as well.
  3. Big Al’s Specialty Movers  –  These guys are big! And friendly! I haven’t worked with them, but I’ve only heard good things about them
  4. Michelle’s Pianos  –  In addition to selling pianos (Michelle’s is currently the Steinway dealer in Portland), Michelle’s also moves piano in the Portland area.

“Anytime” and “Silent Pianos”

Sometimes you want to play the piano, or your kids need to practice for their lesson, but the noise is a problem. It could be late at night, or the baby is sleeping, or you just need some peace and quiet. These “Anytime Pianos” solve this problem. Kawai and Yamaha make a high quality upright fully acoustic piano that can be played “silently” with headphones when you need it quiet. A keyboard can offer a similar solution, but it never sounds like a piano or, more importantly for a practicing student, feels like a real piano.
IMG_3483

These “silent pianos” offer the best of both worlds. They sound and feel like a real piano, and you can plug your headphones in and play silently when you need to!
All the normal strings, hammers, parts and felt are found inside these pianos along with electronic sensors under the keys for playing in silent mode. Also, right in front of the “hammer shank,” there is a rubber bar that can be moved forward to block the hammers actually hitting the strings. The rubber creates the feel of the normal rebound of the hammer against the string.

I see these pianos frequently in apartment buildings where using a normal acoustic piano could be annoying to neighbors. I also have seen these pianos in school offices. A piano is an essential tool for a band or choir director in selecting music etc., but their offices are usually connected to rehearsal spaces. These pianos let them use a piano when they need to without disrupting rehearsals.

Kawai has three models that have this system installed, including their flagship K-300. Yamaha offers this system installed on nearly all their models.

If these pianos sound useful to you, I encourage you to take a look at them. You can find the Kawai Anytime Piano at Portland Piano Company and the Yamaha Silent Piano at Classic Pianos.

I got to work with a Yamaha MP-100. It was badly out of tune so I put the headphones on but didn’t engage the silent mode. I got to hear it in tune and out of tune at the same time!

IMG_3482

Case Touch-Up

While rubbing shoulders with some skilled refinishers and touch-up artists, I’ve picked up some skills to help your piano not only sound its best, but look better too! I’ve been doing some case touch-up work that can dramatically improve how your piano looks. Here are some before and after photos of a piano I recently worked on.
IMG_3025

IMG_3030

This kind of touch up doesn’t take large amounts of time and I’m happy to include it in a tuning visit for minimal additional cost.

Grotrian Pianos

FullSizeRender (2)

Germany has a long tradition of producing high quality products and its pianos are no exception! Germany is home to several high quality piano manufacturers, including Steinway (Hamburg), Bluthner, Bosendorfer (Austria), Bechstein, Schimmel and Grotrian, or Grotrian-Steinweg, to use their German name.

Grotrian pianos have been produced in Braunschweig (Brunswick) Germany since 1856 when Friedrich Grotrian became partner with Heinrich Steinweg (who immigrated to the US as Henry Steinway!). As Henry Steinway began to focus on the American market in New York, the Grotrian family bought out his interest in the Grotrian-Steinweg factory in the 1860’s. The company prospered in the early 20th century producing a peak of 3000 pianos in 1927. The company survived the Great Depression, learned to make aircraft during WWII, repaired the bombed factory and has continued making some of the finest pianos on the market. Grotrian currently produces around 500 upright and 100 grand pianos of various sizes annually.
grotrian-steinweg

factory

Grotrian-Steinweg won several awards at world fairs and exhibitions and was the preferred instrument of great pianists including Clara Schumman, Paderewski, and Eugen d’Albert.
There has been tension between Steinway and Grotrian-Steinweg over the use of “Steinweg” for years and in 1977 the company dropped Steinweg from their name for all pianos sold in America (they still used Grotrian-Steinweg in all European pianos).

But enough history! Grotrian makes a wonderful piano! You should play one!

Grotrian uprights quickly replaced Schimmels (also German) as my favorite upright. Their sound is massive and the action is so responsive it feels like I’m playing a grand. Both their sound and touch is my favorite in any upright I’ve ever played.

Grotrian 57cm Classic Model

Grotrian 57cm Classic Model

Grotrian produces several different sizes of uprights ranging from the more affordable 52cm Freidrich model to the 66cm Concertina model which will costs you a bit over $30,000. And it would be worth every penny!

Grotrian produces several sizes of grands, ranging from the 5’4″ Chambre to the 1,200lb, 9′ “Concert Royal” grand. Their tone is very clear and “German” in quality. The range of dynamic is supurb, and while more aggressive than the Austrian Bosendorfer, the Grotrian is still a mellower piano than the Steinway. The pianos come from the factory precisely prepared and with very little work needed before they are put on the showroom floor.

The Grotrian Concert Grand

The Grotrian Concert Grand

While expensive, they are still a good deal cheaper than Bosendorfer and Steinway pianos in the same class. So if you’re looking for a wonderful, first tier piano, Grotrian is probably the least expensive way to go.

I’ve been able to work on several Grotrians, including a couple odd uprights from the 1950’s, a 9′ concert grand from the 70’s or 80’s and many new uprights and grands at Portland Piano Company.

The 1950's style Grotrian-Steinweg Console

The 1950’s style Grotrian-Steinweg Console

I recently got to tune a newly acquired Grotrian grand at Reed College in preparation for one of Paul Roberts’ master classes in February. Reed college has a new performing arts building and one of their concert spaces now features this 7′ Grotrian, sporting the durable “institutional finish.” It sounds wonderful in its space and I stopped to play for a good while when I was done tuning.

You can read more about Grotrians here on their website, or on Wikipedia. You can walk into Portland Piano Company and play several models of these beautiful pianos, or peruse their selection online here.

I’ll leave you with a couple more pictures of the grand at Reed College.
FullSizeRender (1)

I also installed a fallboard lock on this piano.
IMG_2131

Finest workmanship and materials evident here under the “belly.”FullSizeRender

The Upright Piano Complete Service Package

One of the main things I do for Portland Piano Company is refurbish used pianos that come in before PPC resells them. My goal is to get them playing and sounding their best. I usually spend 4-6 hours cleaning, repairing, regulating, voicing and tuning. I aim to get the piano as close as I can to “new” without starting to replace parts and “rebuild” the piano.

I’m now offering this service package to customers in their homes at a considerable savings. If your piano hasn’t been tuned or worked on in several years, or if it has some oddities or issues that haven’t been resolved in normal tuning visits, or if you want to give your piano the ultimate “piano spa” treatment, this extensive service visit might be a great way to get your piano back to playing and sounding its very best!
I set aside an entire day for this service and charge between $350 (if it takes less than 5 hours) and $450 (if it takes more than 5).

In a nutshell this service includes:
1. Cleaning
2. Action Regulation
3. Basic Repairs
4. Hammer Shaping & Maintenance
5. Case Touch Up
6. Tuning & Voicing

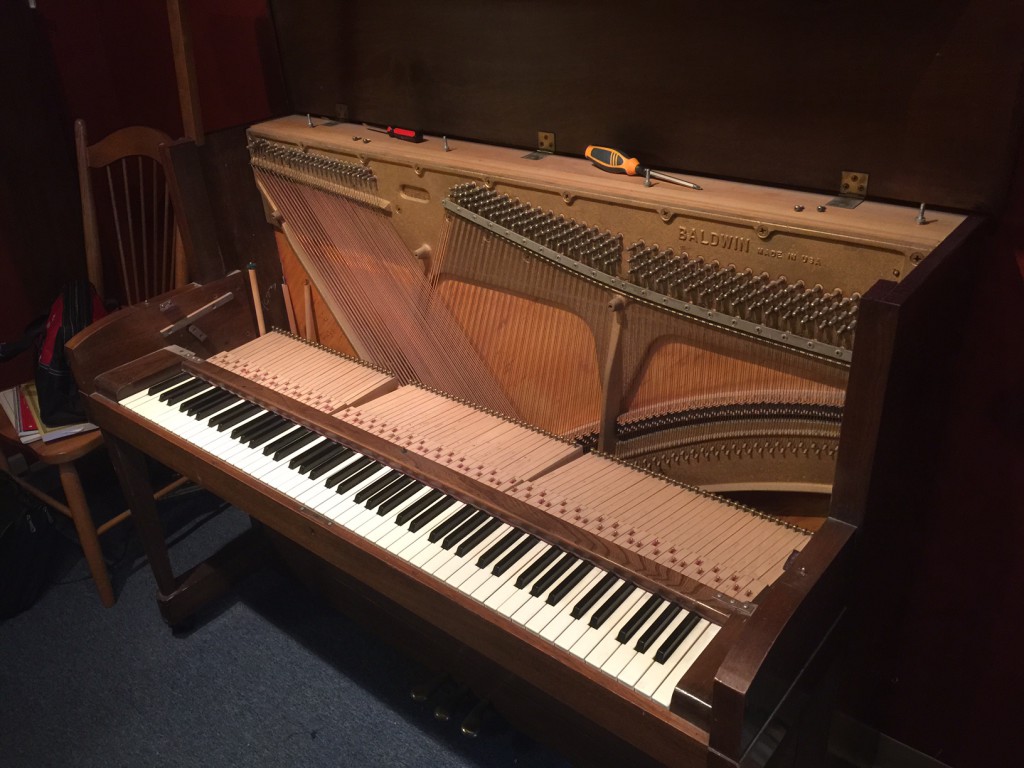
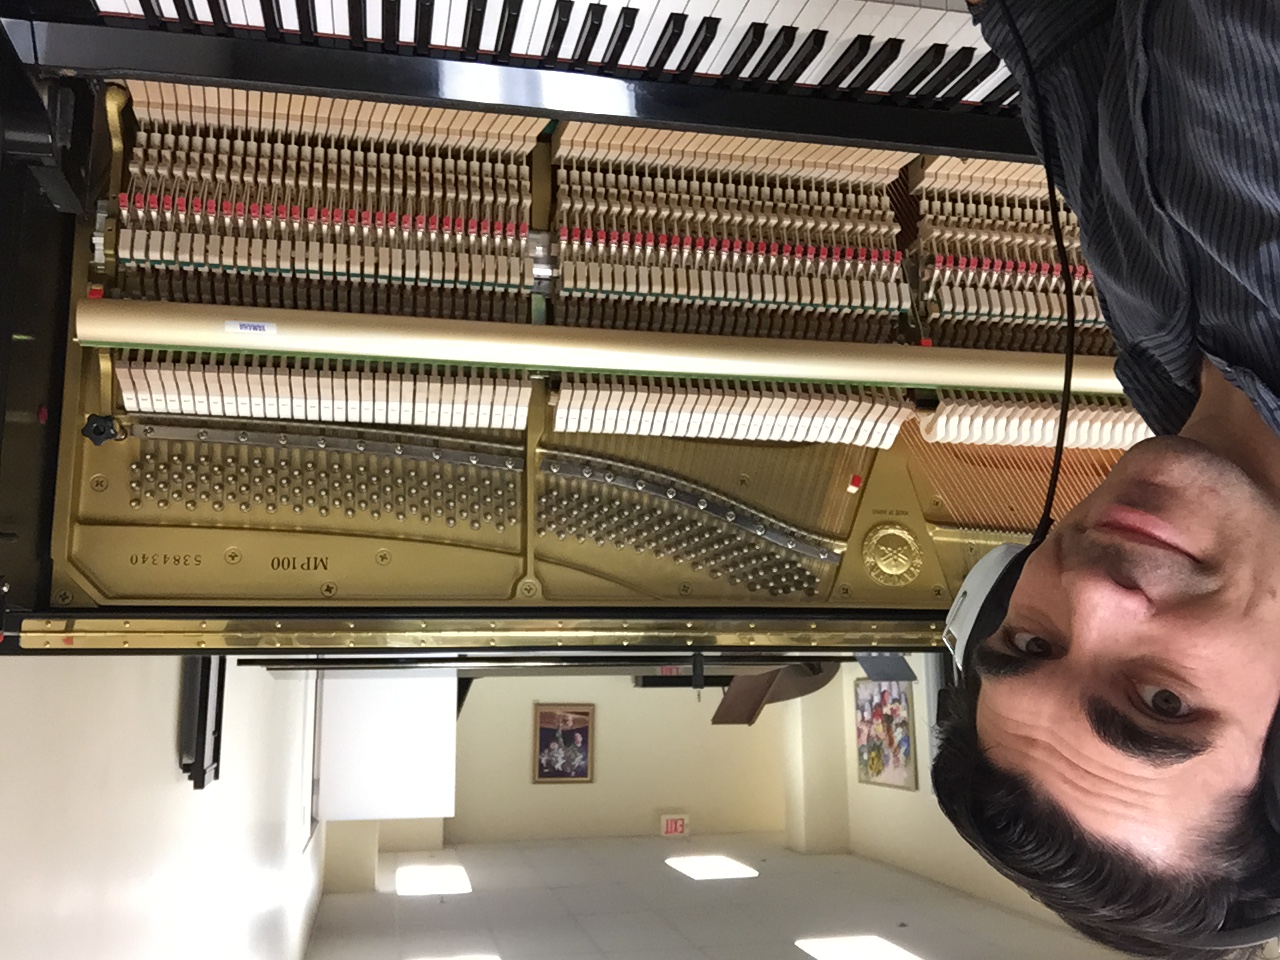
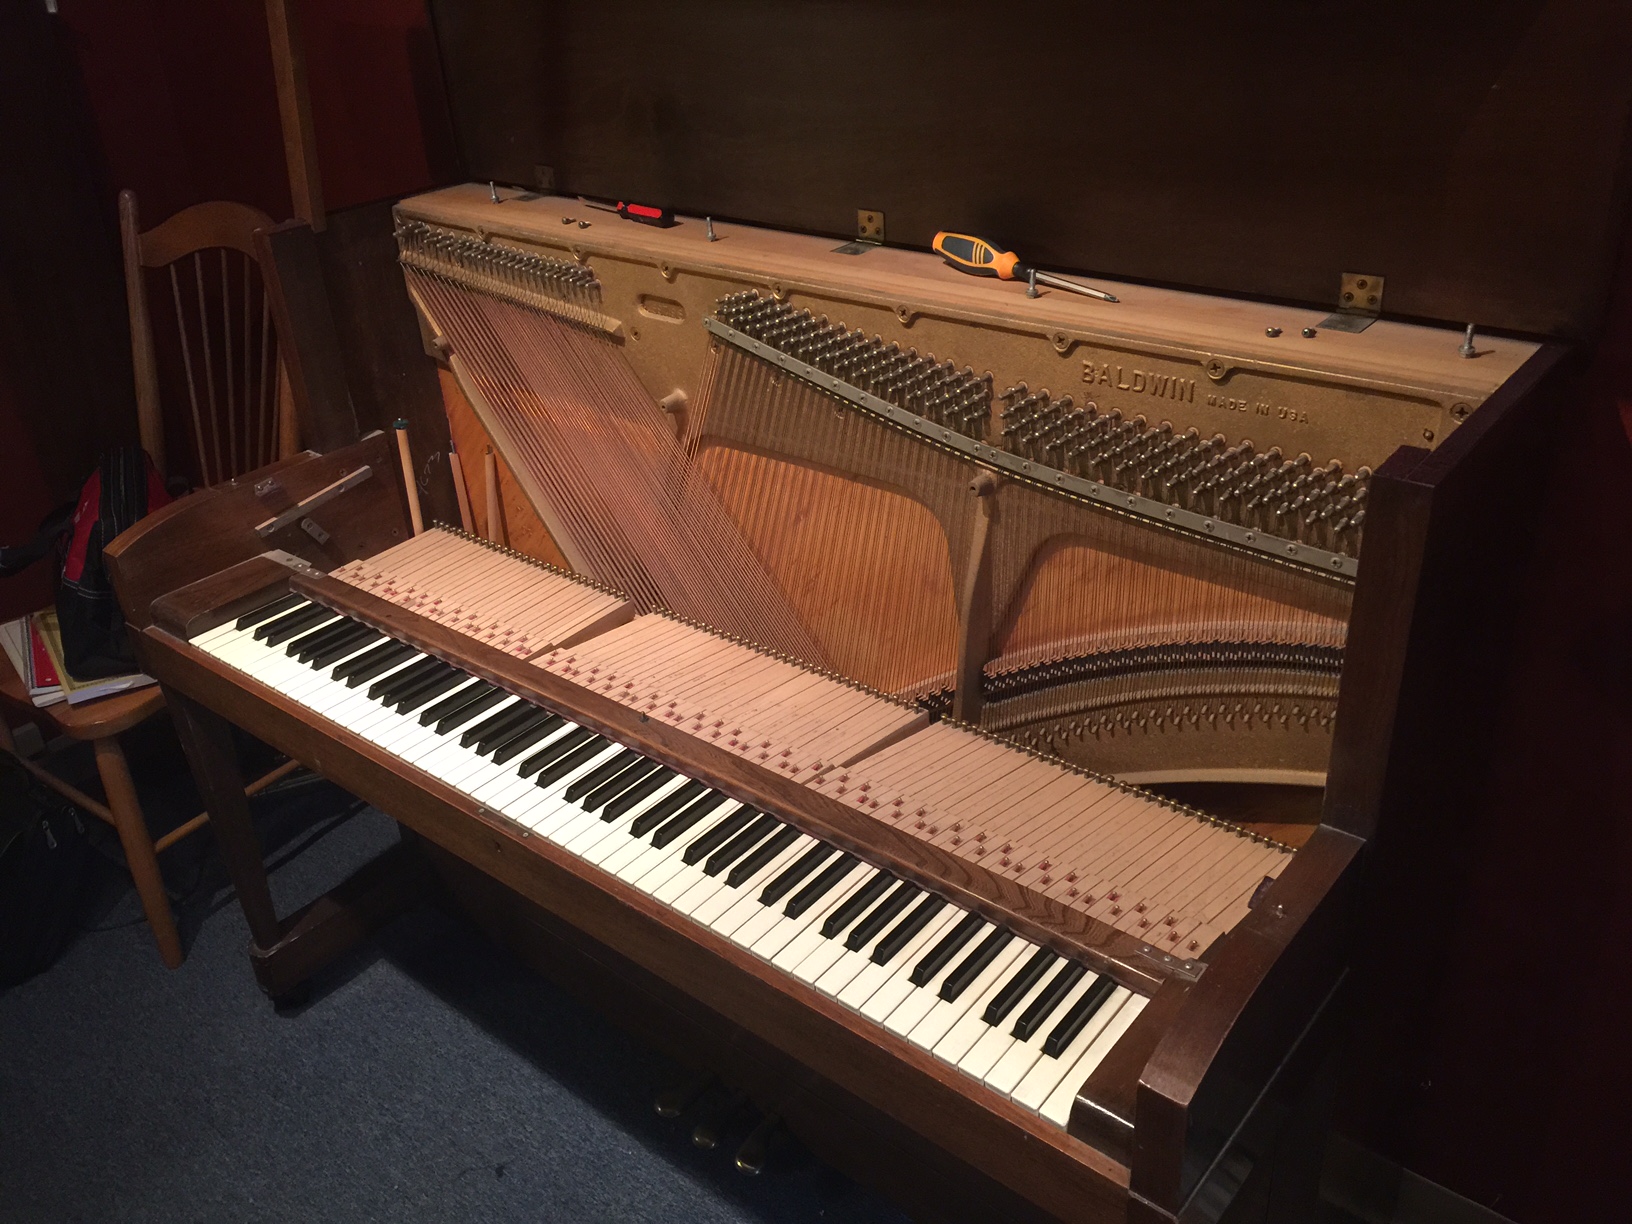
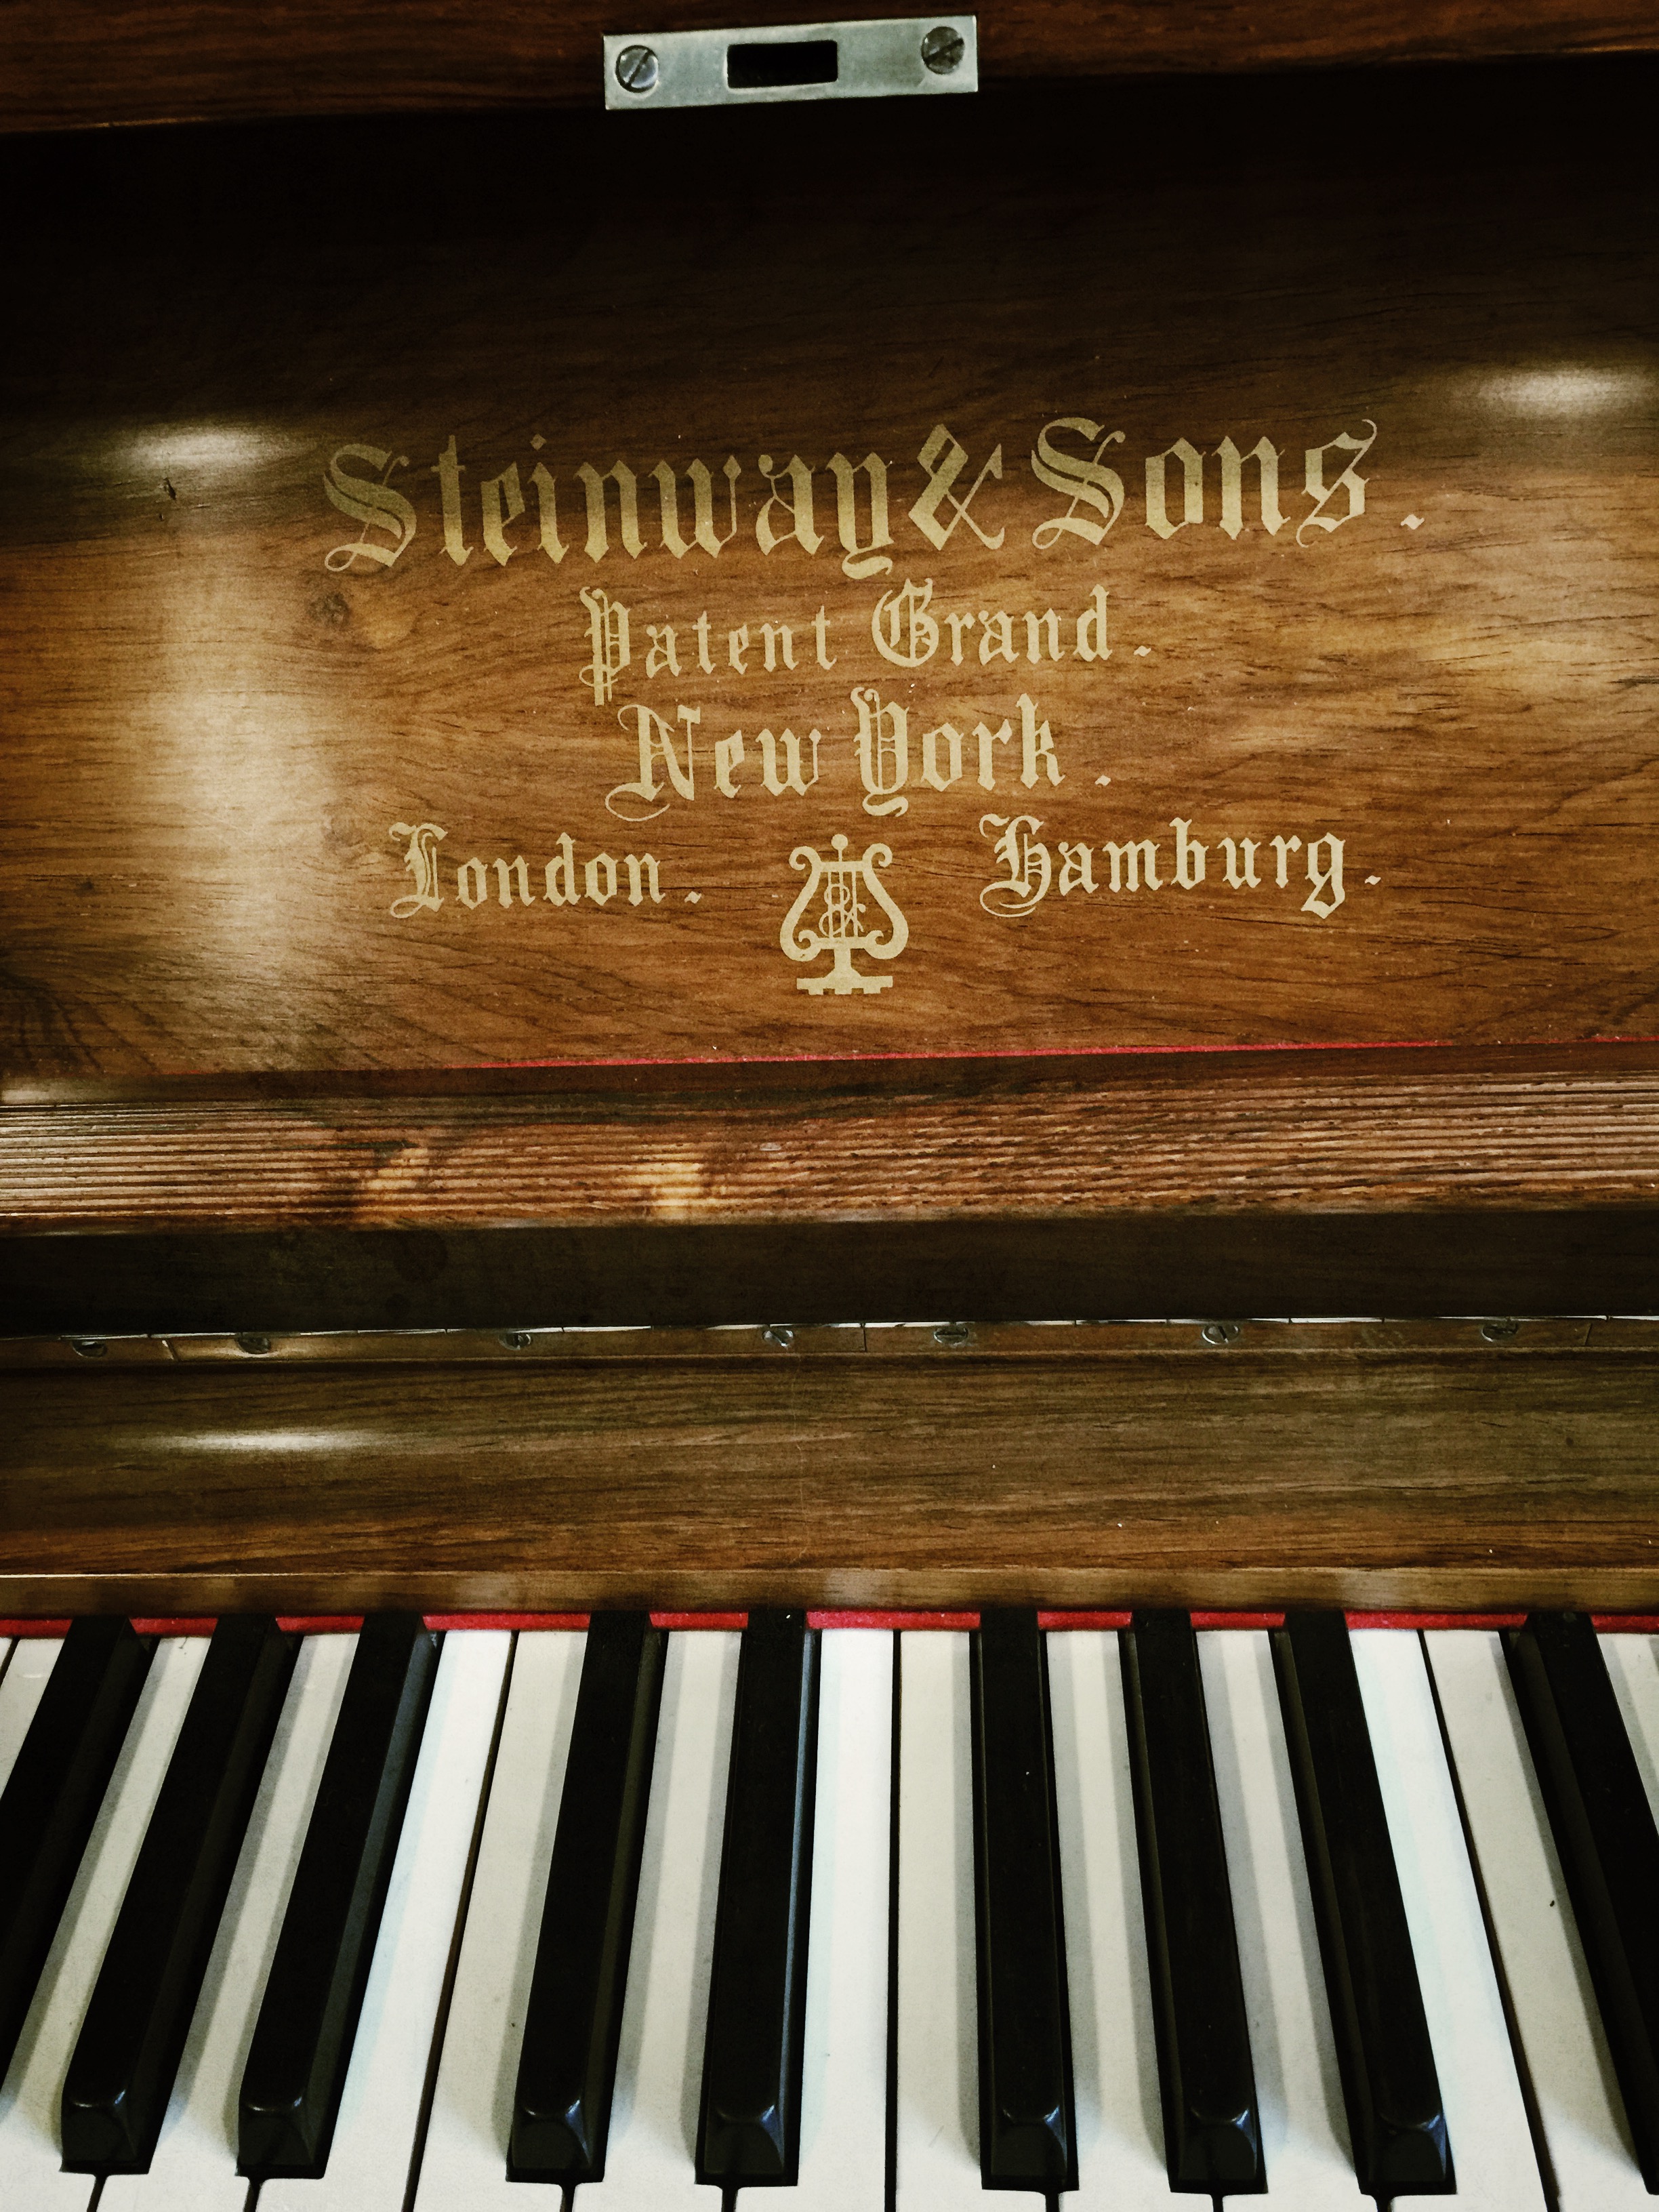
I recently bought an upright to do my teaching on and documented most of the process. Below are lots of pictures and concise descriptions of the normal steps I take when refurbishing an upright.

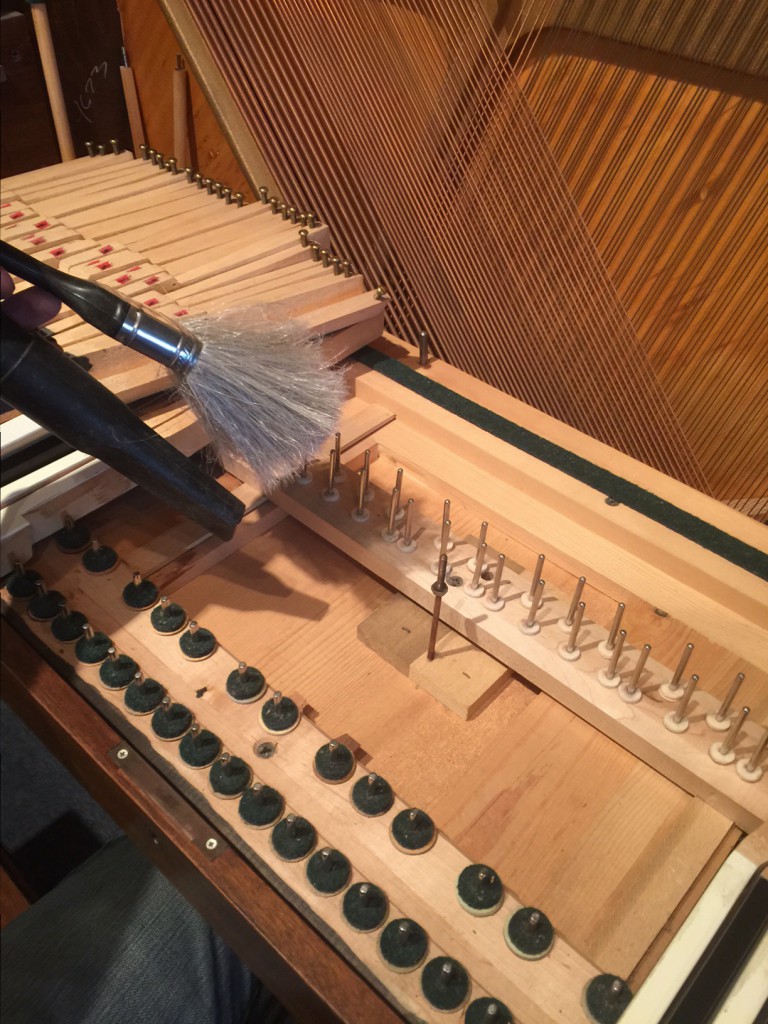
I begin by taking the piano apart. This means taking off all the case parts and removing the action and keys before vacuuming and cleaning the interior of the piano.

upright piano cleaning

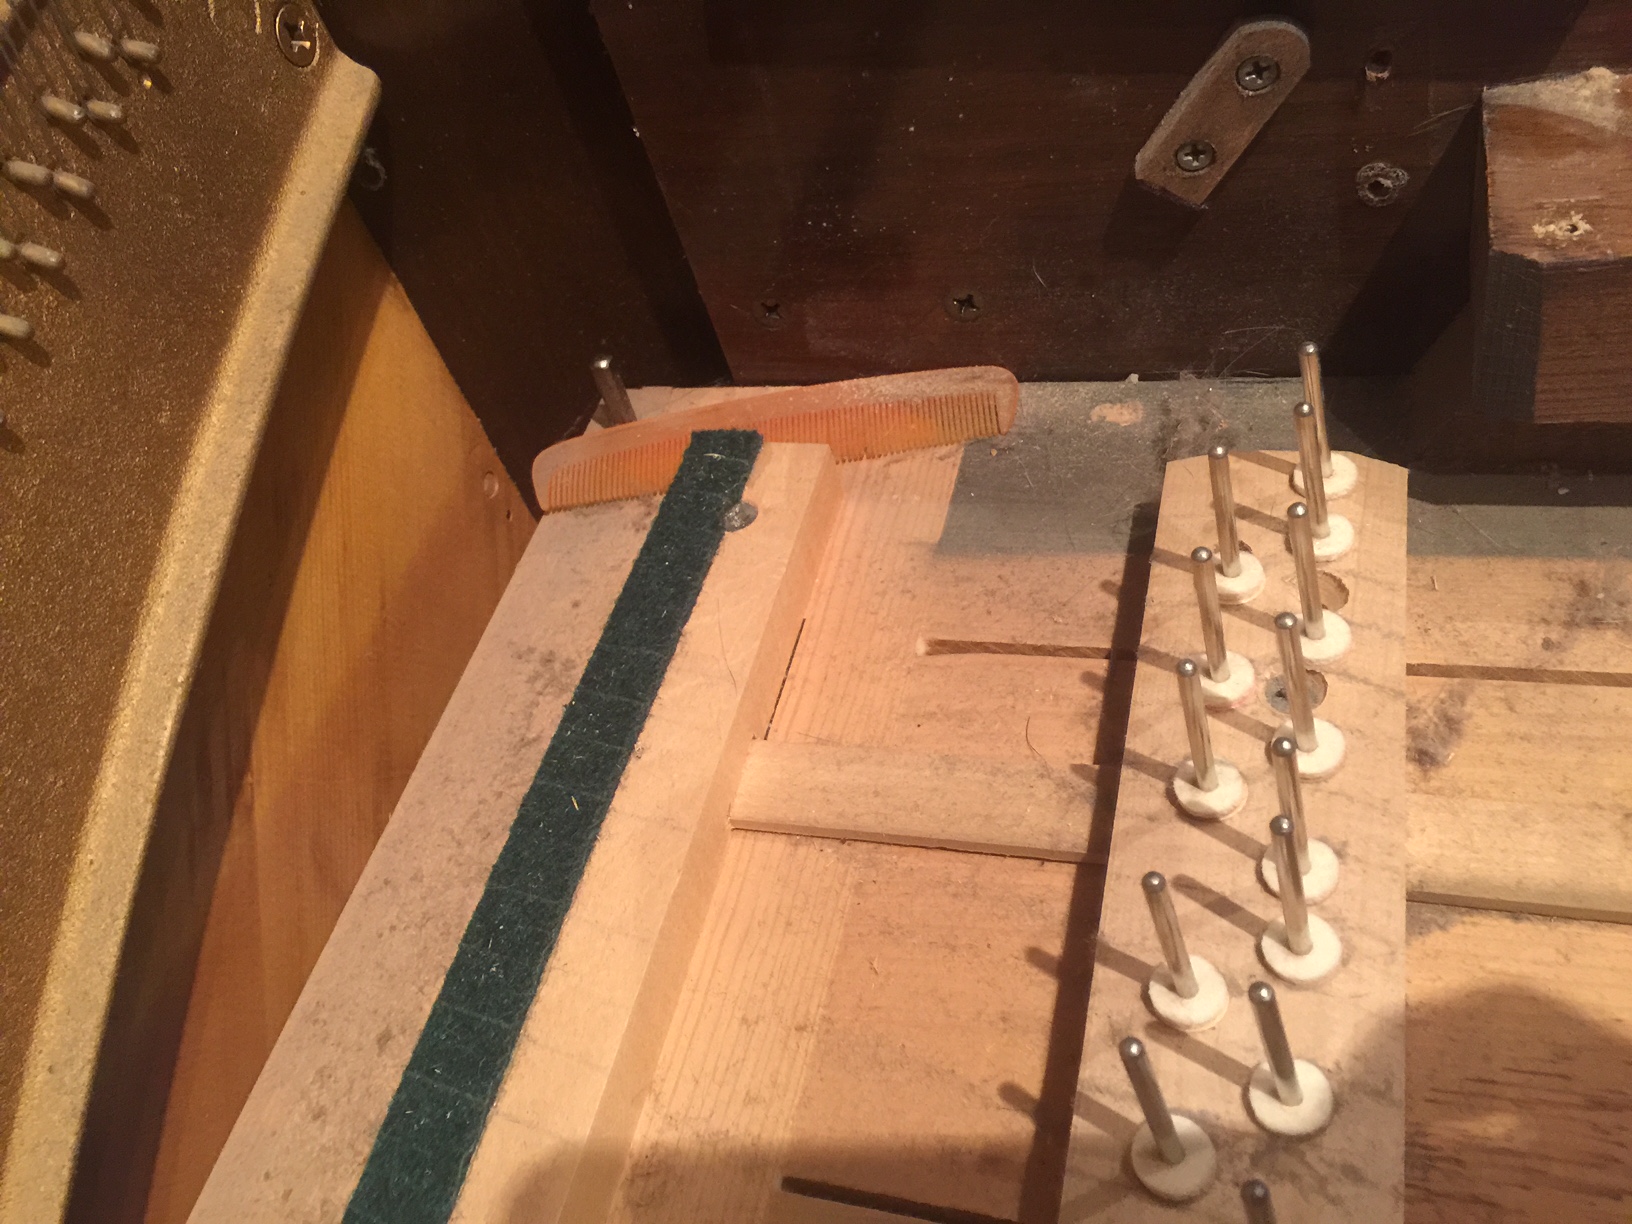
I usually find mostly dust and dirt from years of use, but there have also been pencils, stickers, magazines, toys, pictures, letters, coins, and sometimes even dead rodents! (Eww) Here I found dirt and a comb… Removing dirt and foreign objects helps avoid keys sticking and making clicking noises. There have been many times I’ve opened up a piano to fix a sticking key and it is just a piece of junk stuck between two keys.

piano cleaning 1

piano cleaning

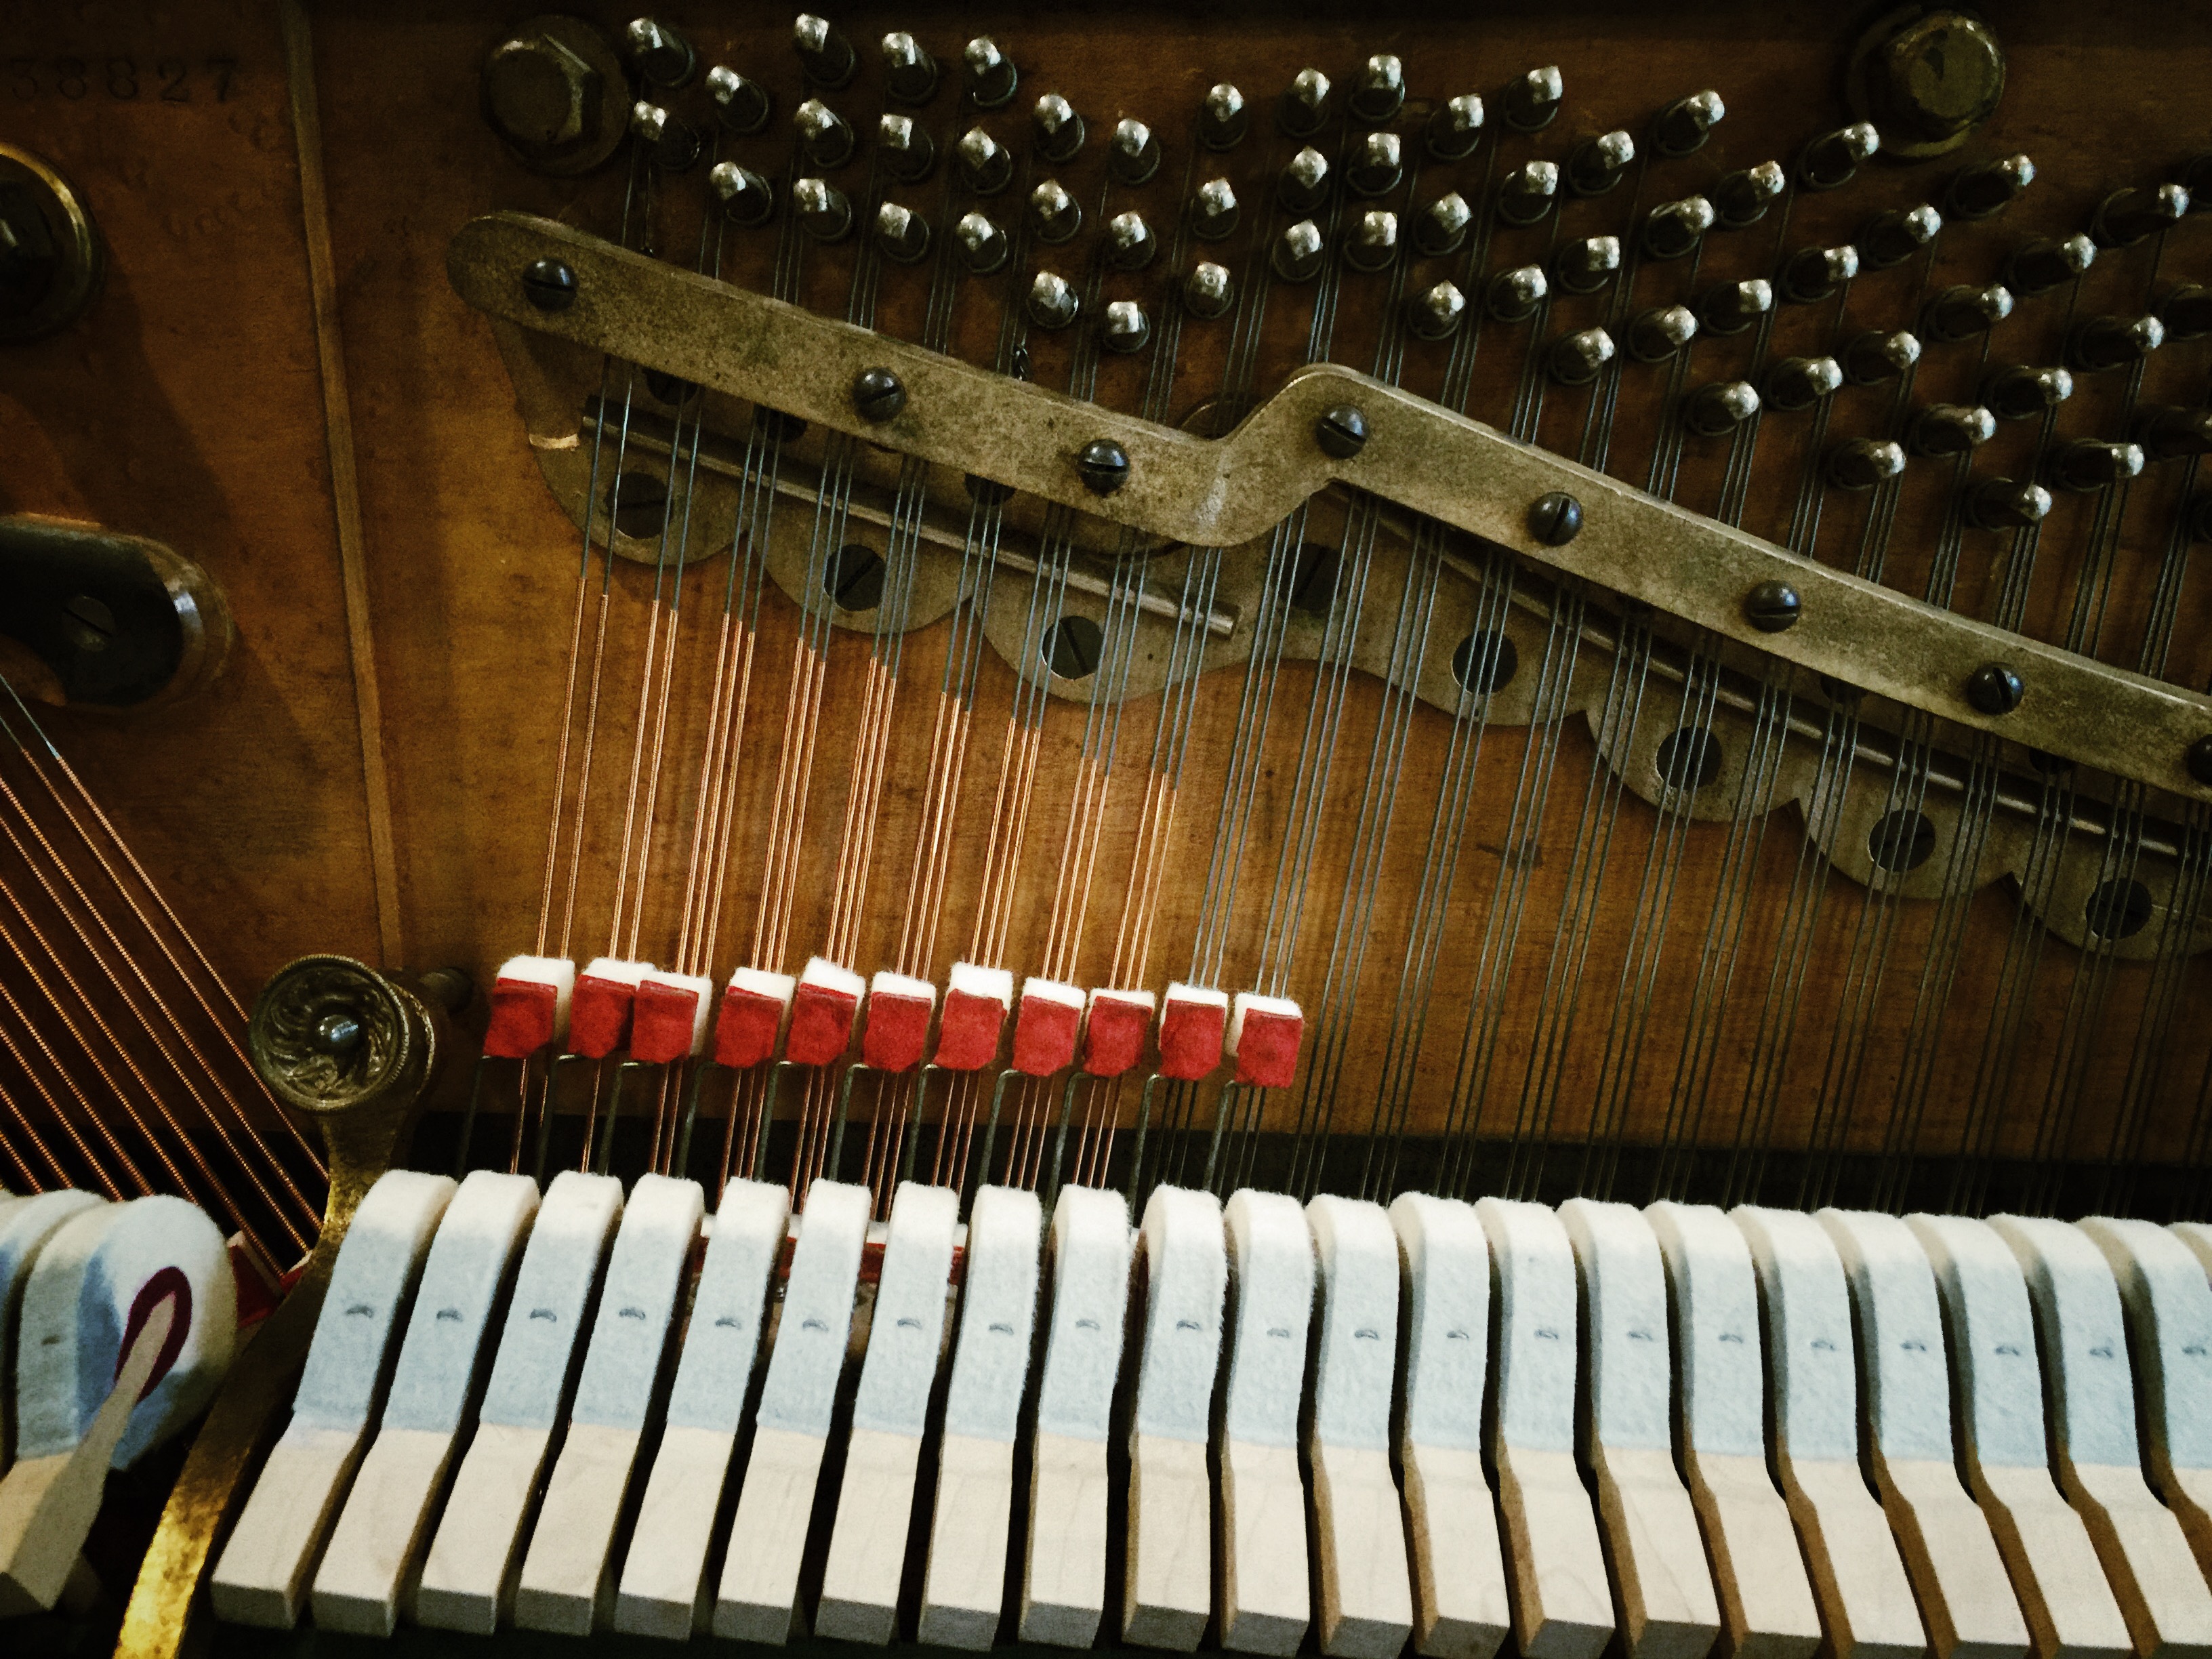
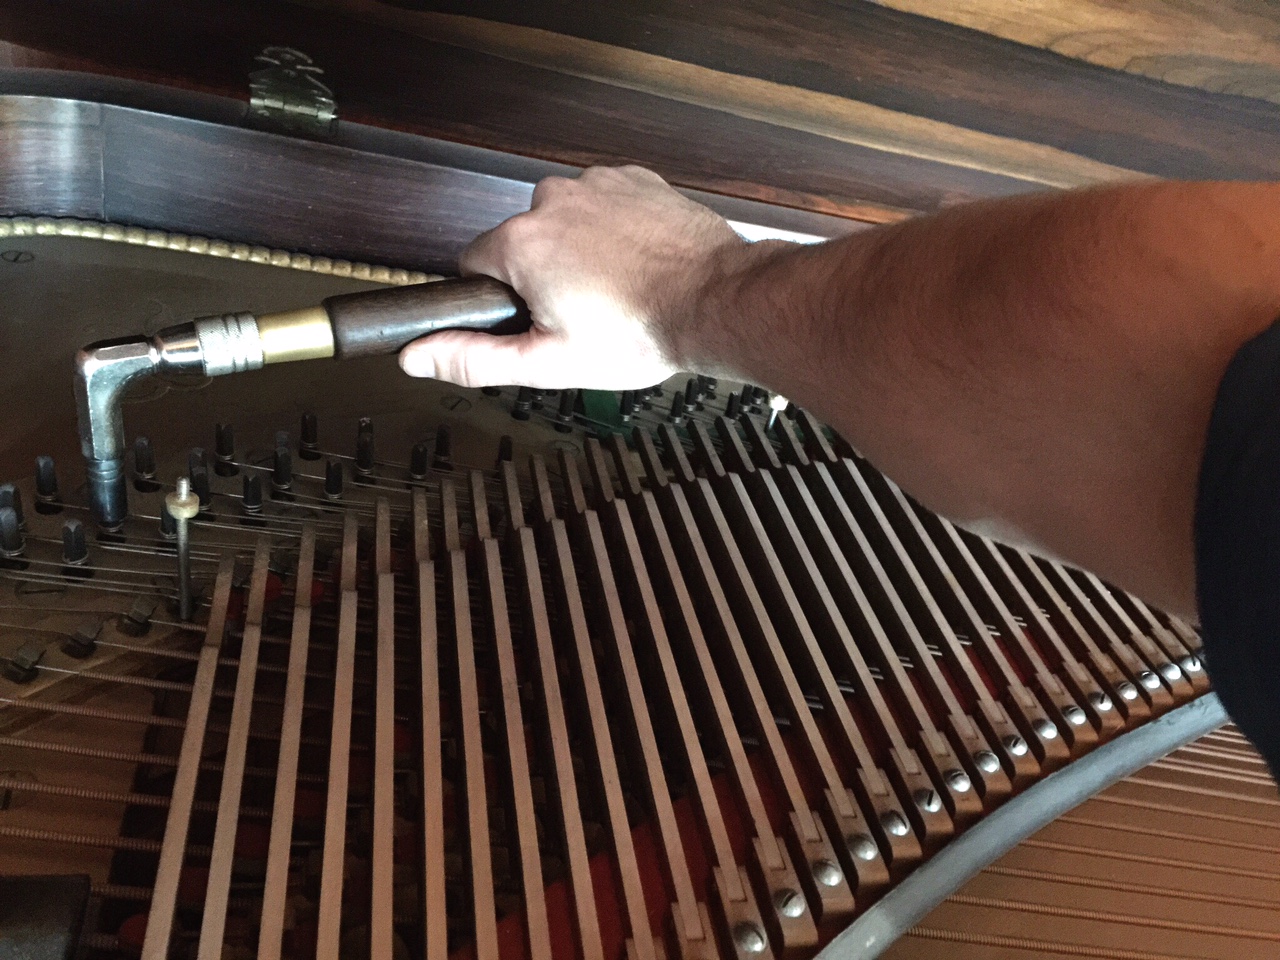
Next I clean the strings and the keys. The bass strings in pianos are steel wire wound with brass. When dust and dirt gets stuck between the coils of the wound strings, it inhibits its vibration and decreases the quality of sound (makes them sound “tubby”). Cleaning the strings not only makes them look better, but makes them sound better too.

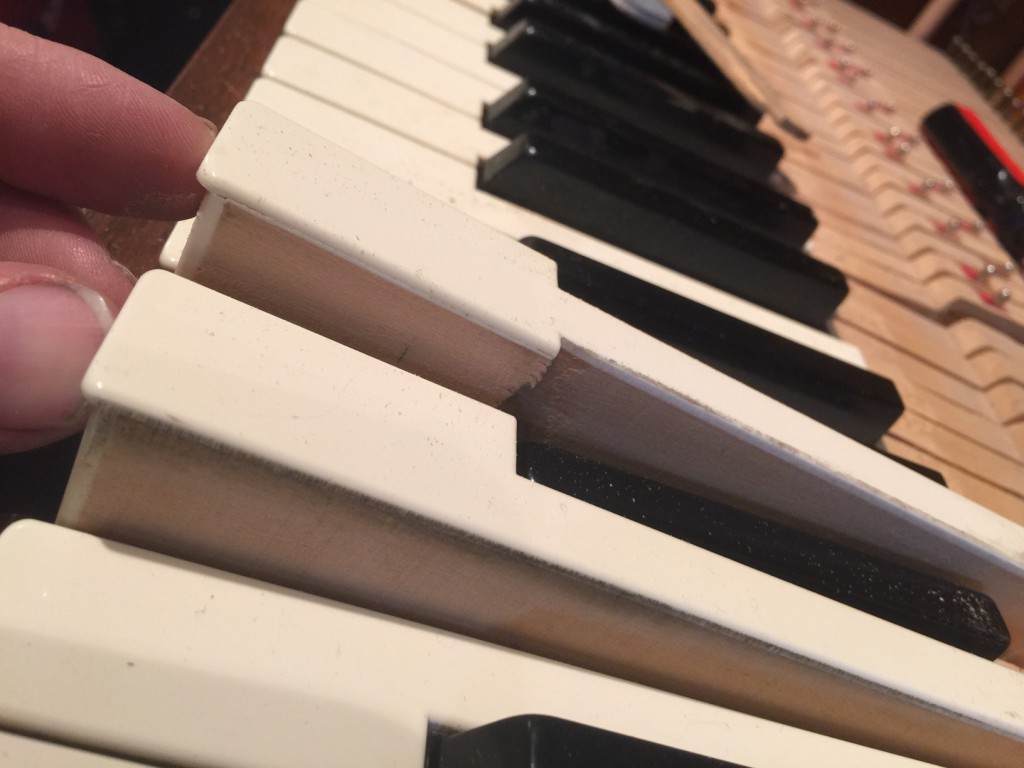
I clean the ivory or plastic keytops, then sand the sides of the keys if they are dirty.The sides of the keys are wood and as they are played over the years they collect dirt and oil from hundreds of hours of playing. They look a lot better and are cleaner when I’m done!

sanding piano keys

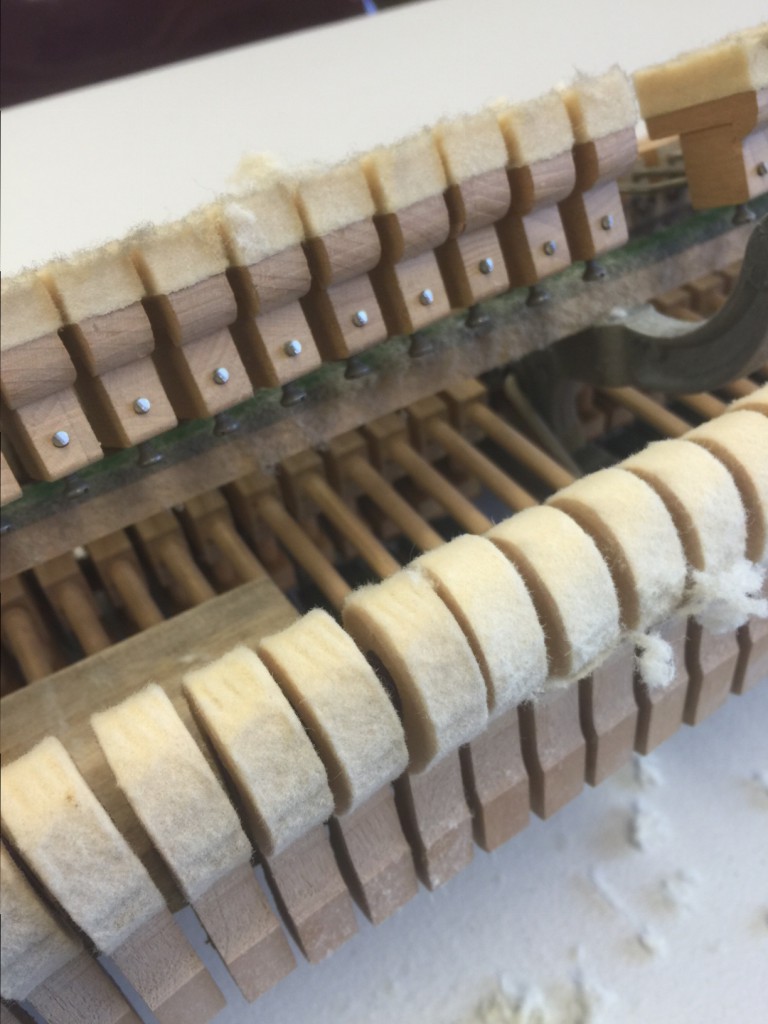
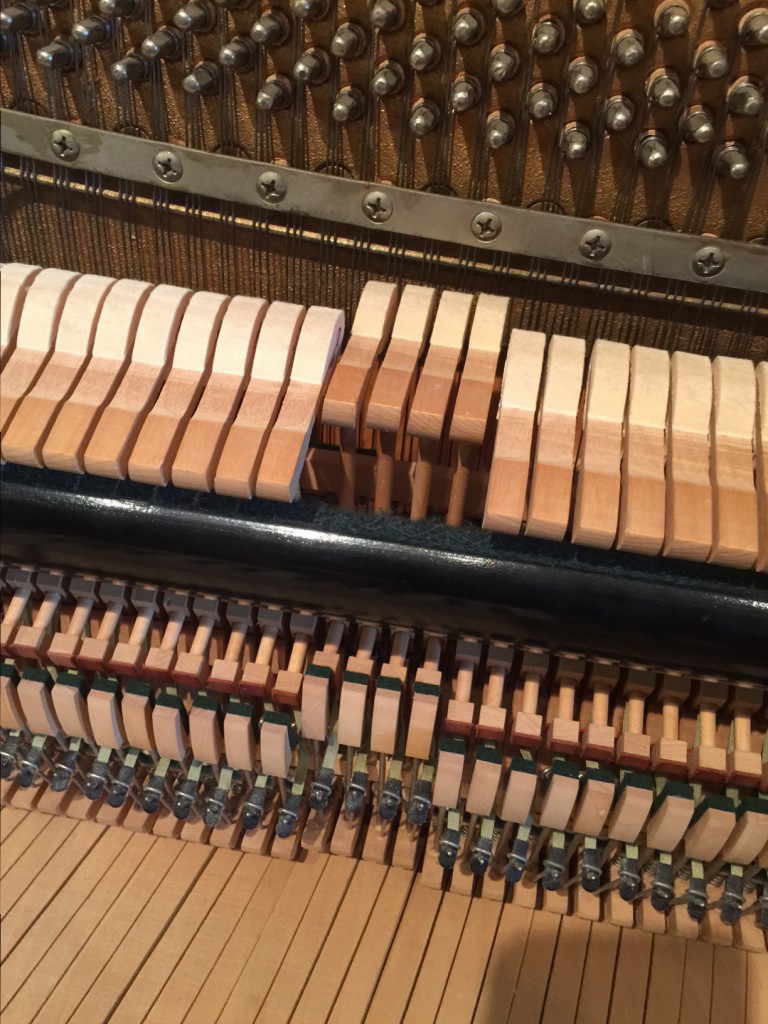
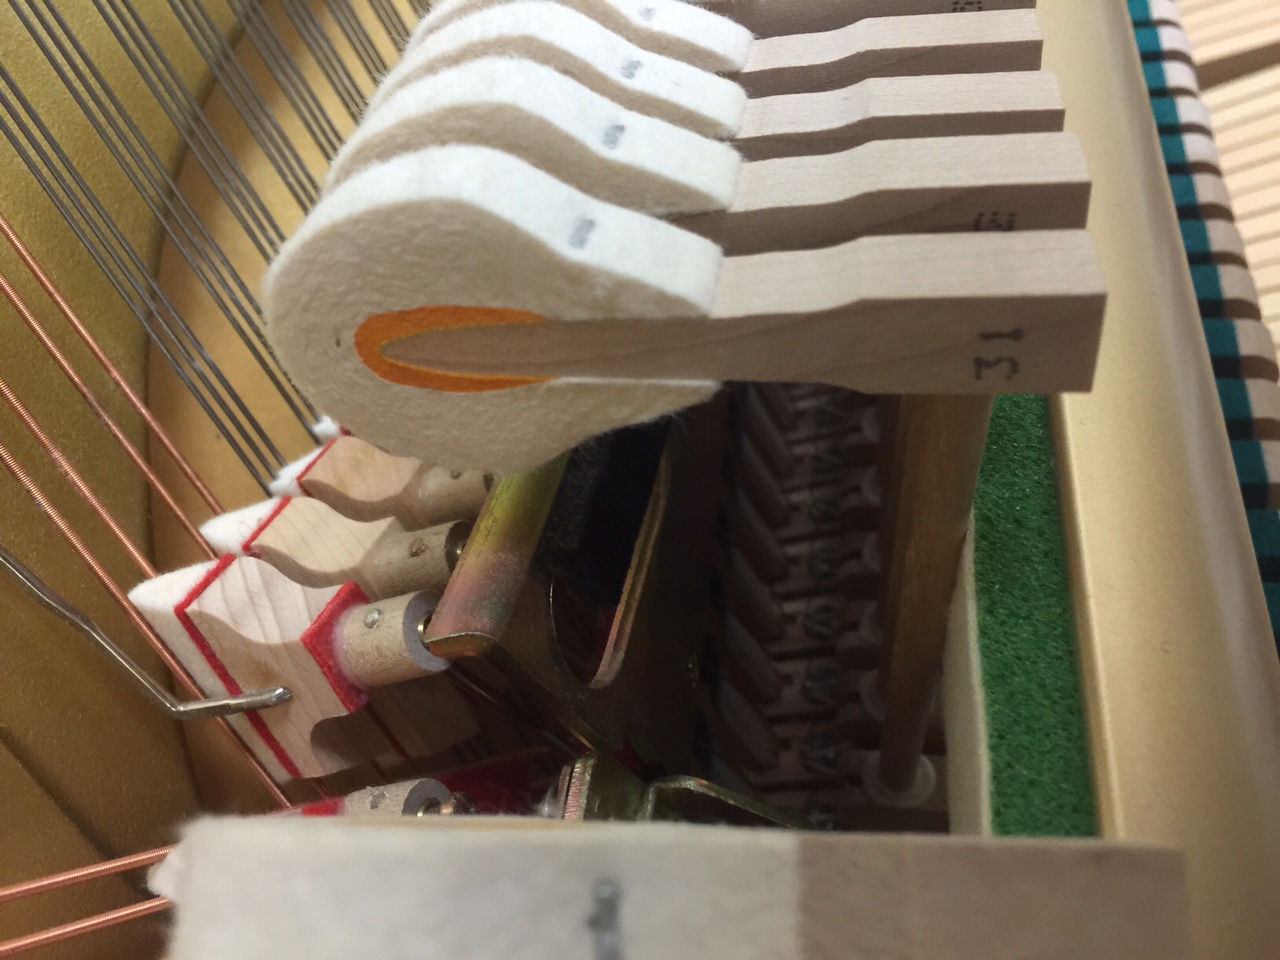
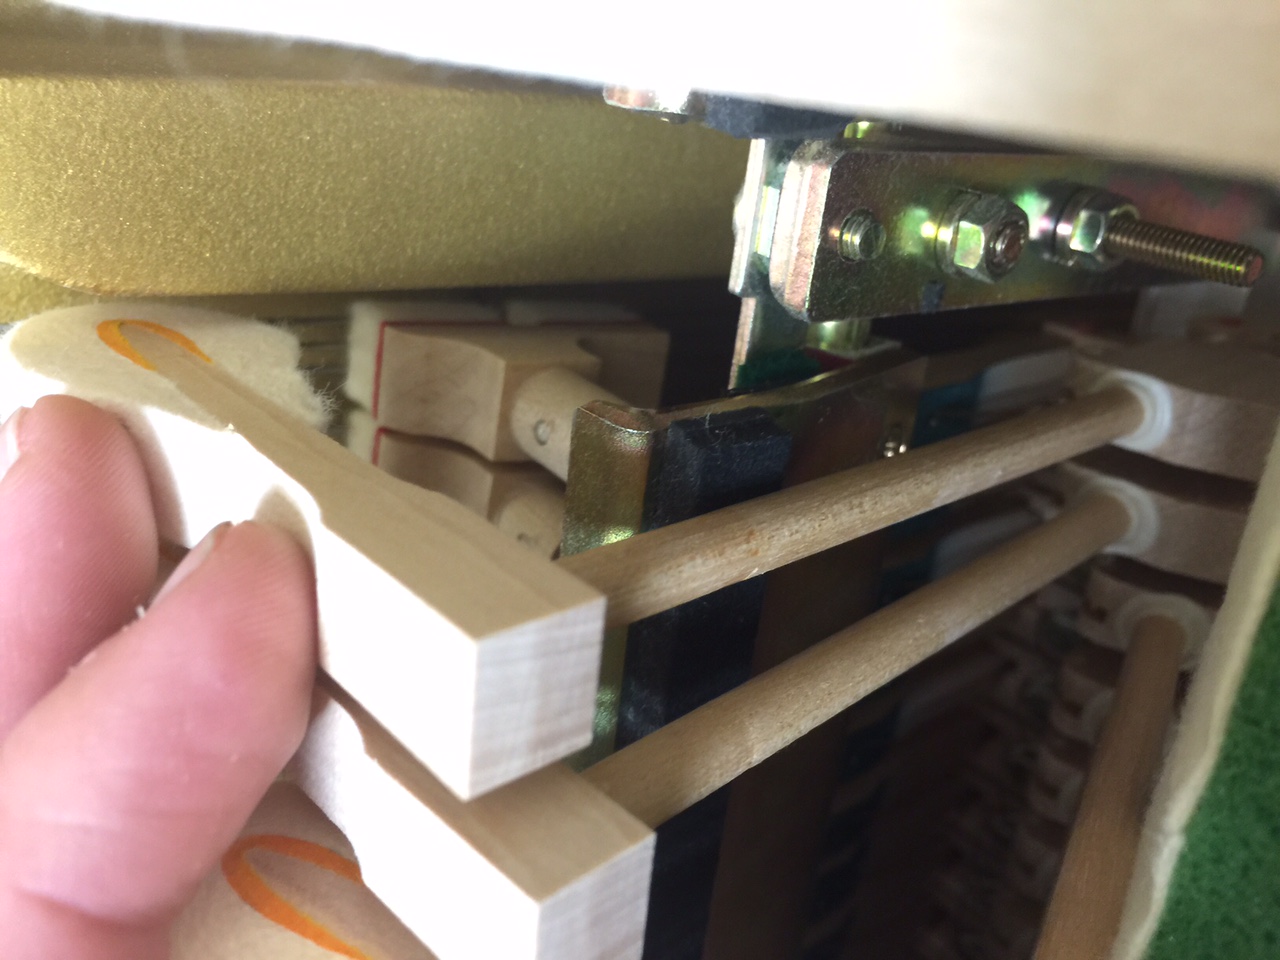
I now move from the keys to the hammers themselves. The felt hammers are what actually initiate the sound coming from your piano, so their condition makes a huge difference in your piano’s tone. After years of playing, the felt hammers will develop grooves where they strike the string, and eventually even flatten out from their original rounded shape. Using sandpaper I carefully take off layers of felt until the original rounded shape of the hammer is restored. This changes the surface area that comes into contact with the string and improves the quality of tone and the length of sustain. You can read more on this process in a previous post.

This is a large part of the job and can easily take two hours or more if there is a lot of wear on the hammers.

hammer reshaping

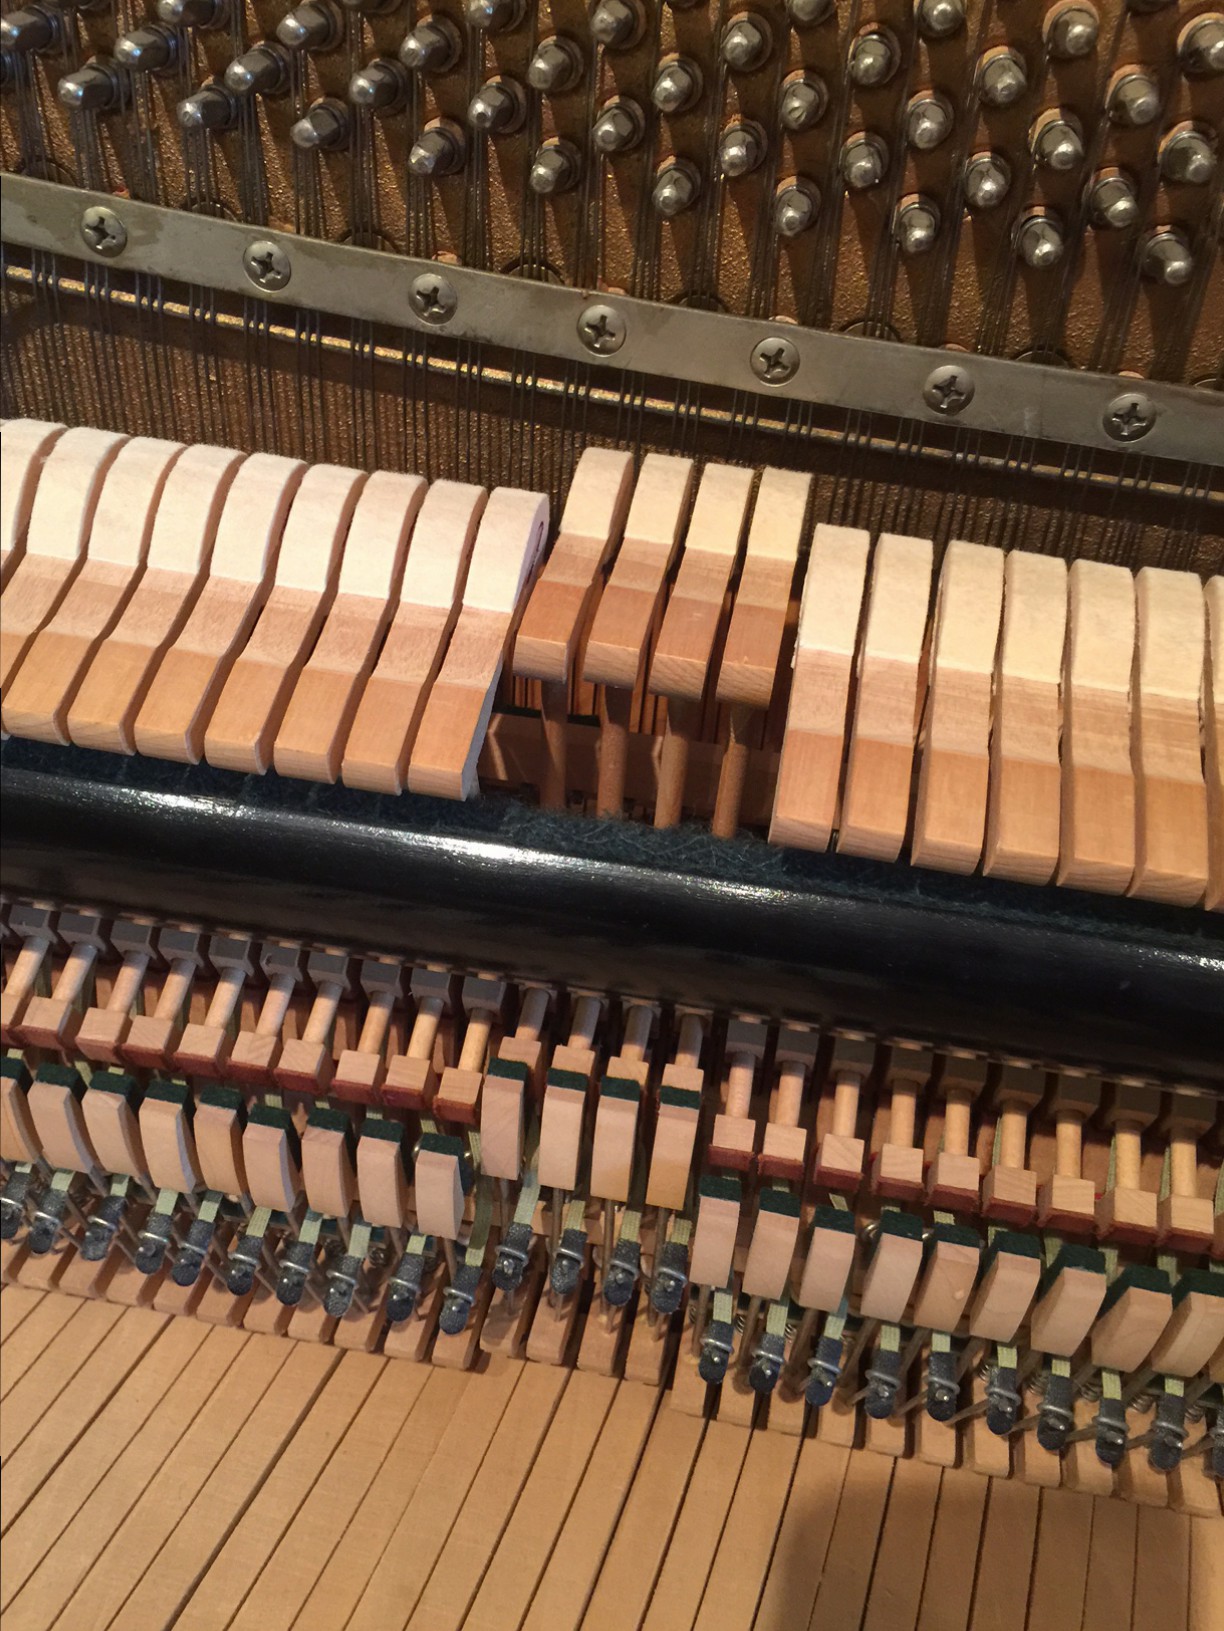
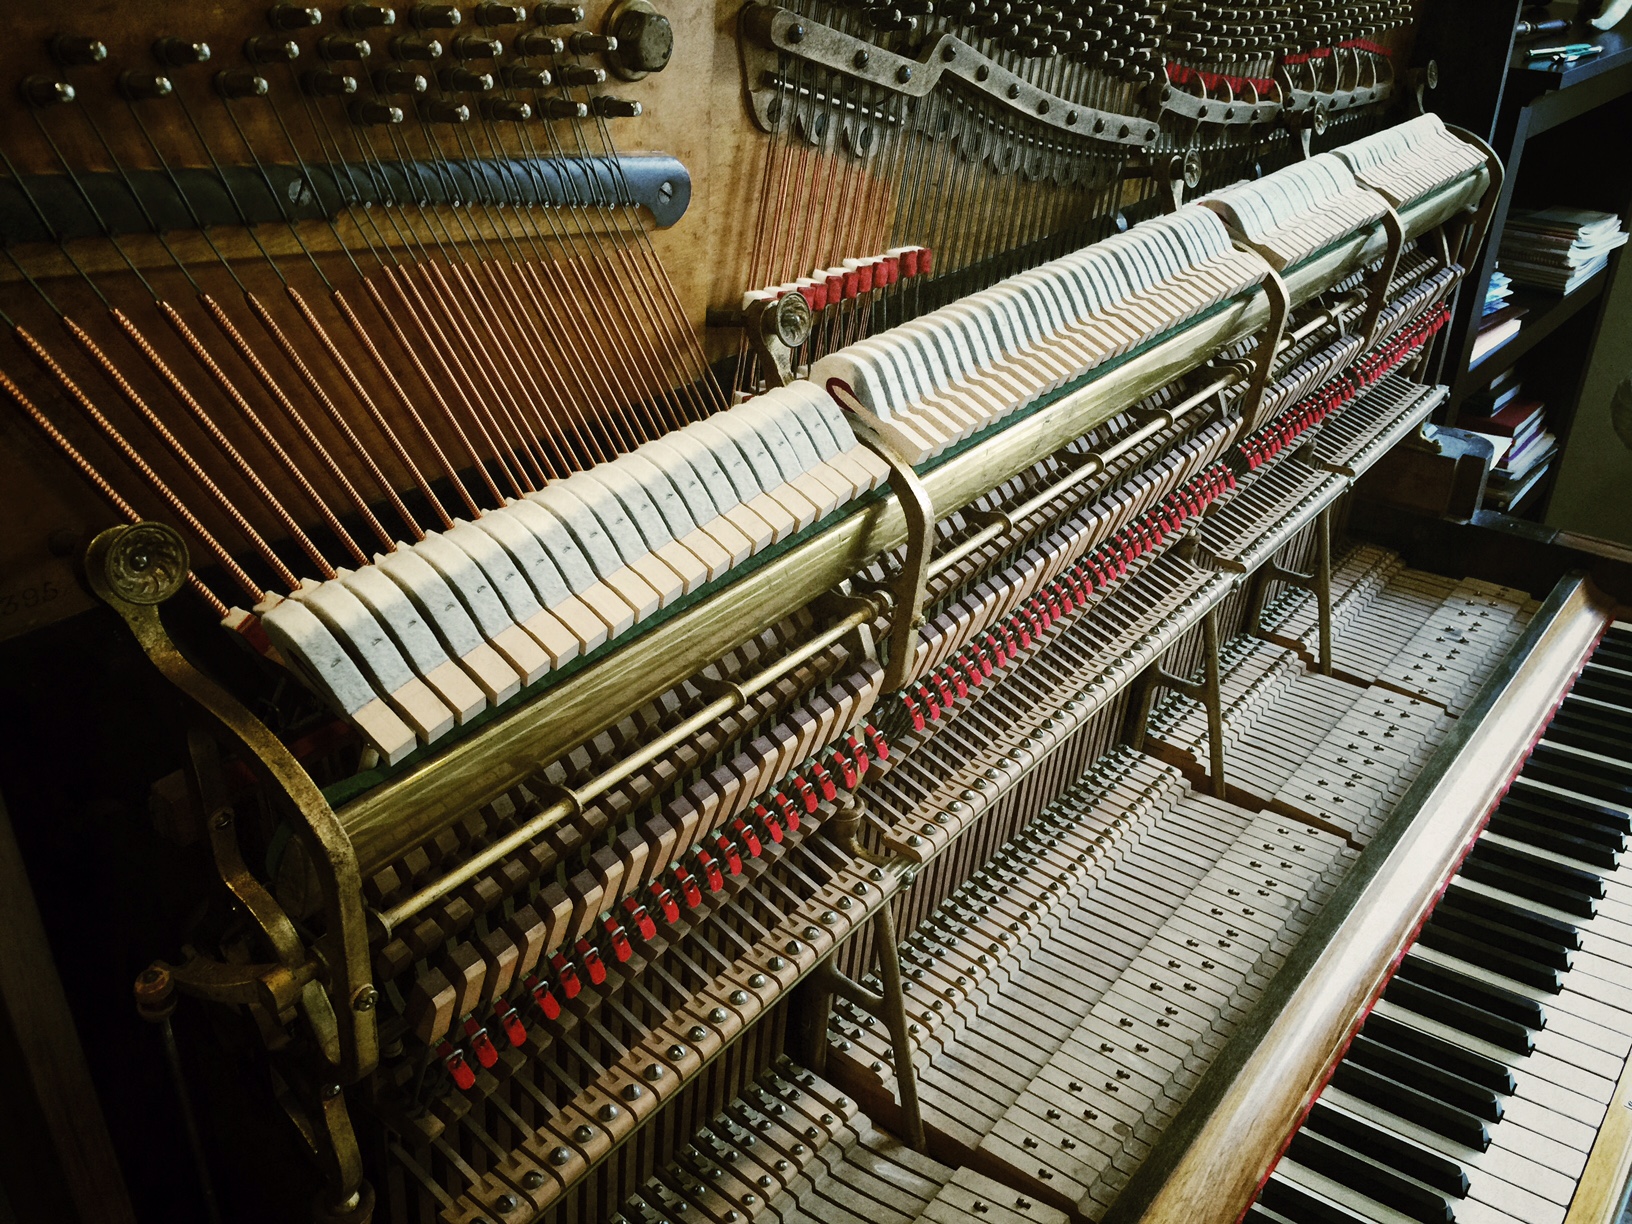
Next I ease and space the keys. Piano keys sit on a “balance rail pin” (the middle of the teeter-totter), and the “front rail pin.” The wood and felt around either metal pin can get tight and/or dirty which adds friction and slows down the piano action, making it harder to play the key and slower to return to place when released. If the keys have become wobbly, the felt might be worn out. If it has to be replaced, I consider it a separate job.

piano key easing

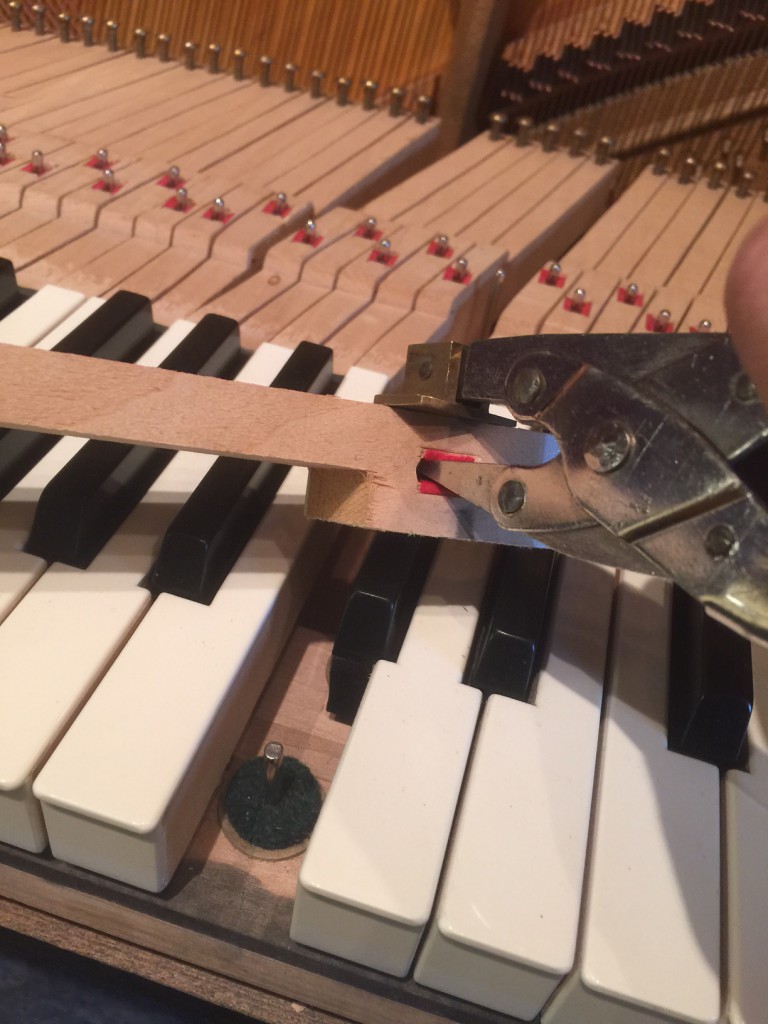
I also straighten and space the keys evenly so there is no gaps between keys or keys rubbing together.

Piano key spacing

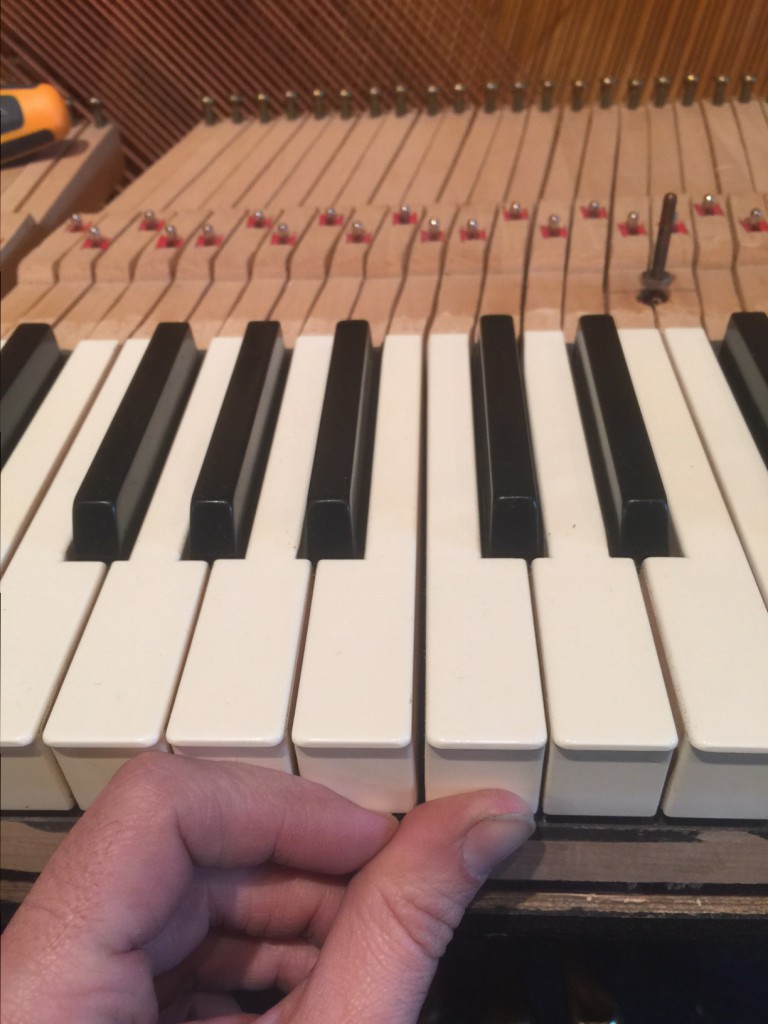
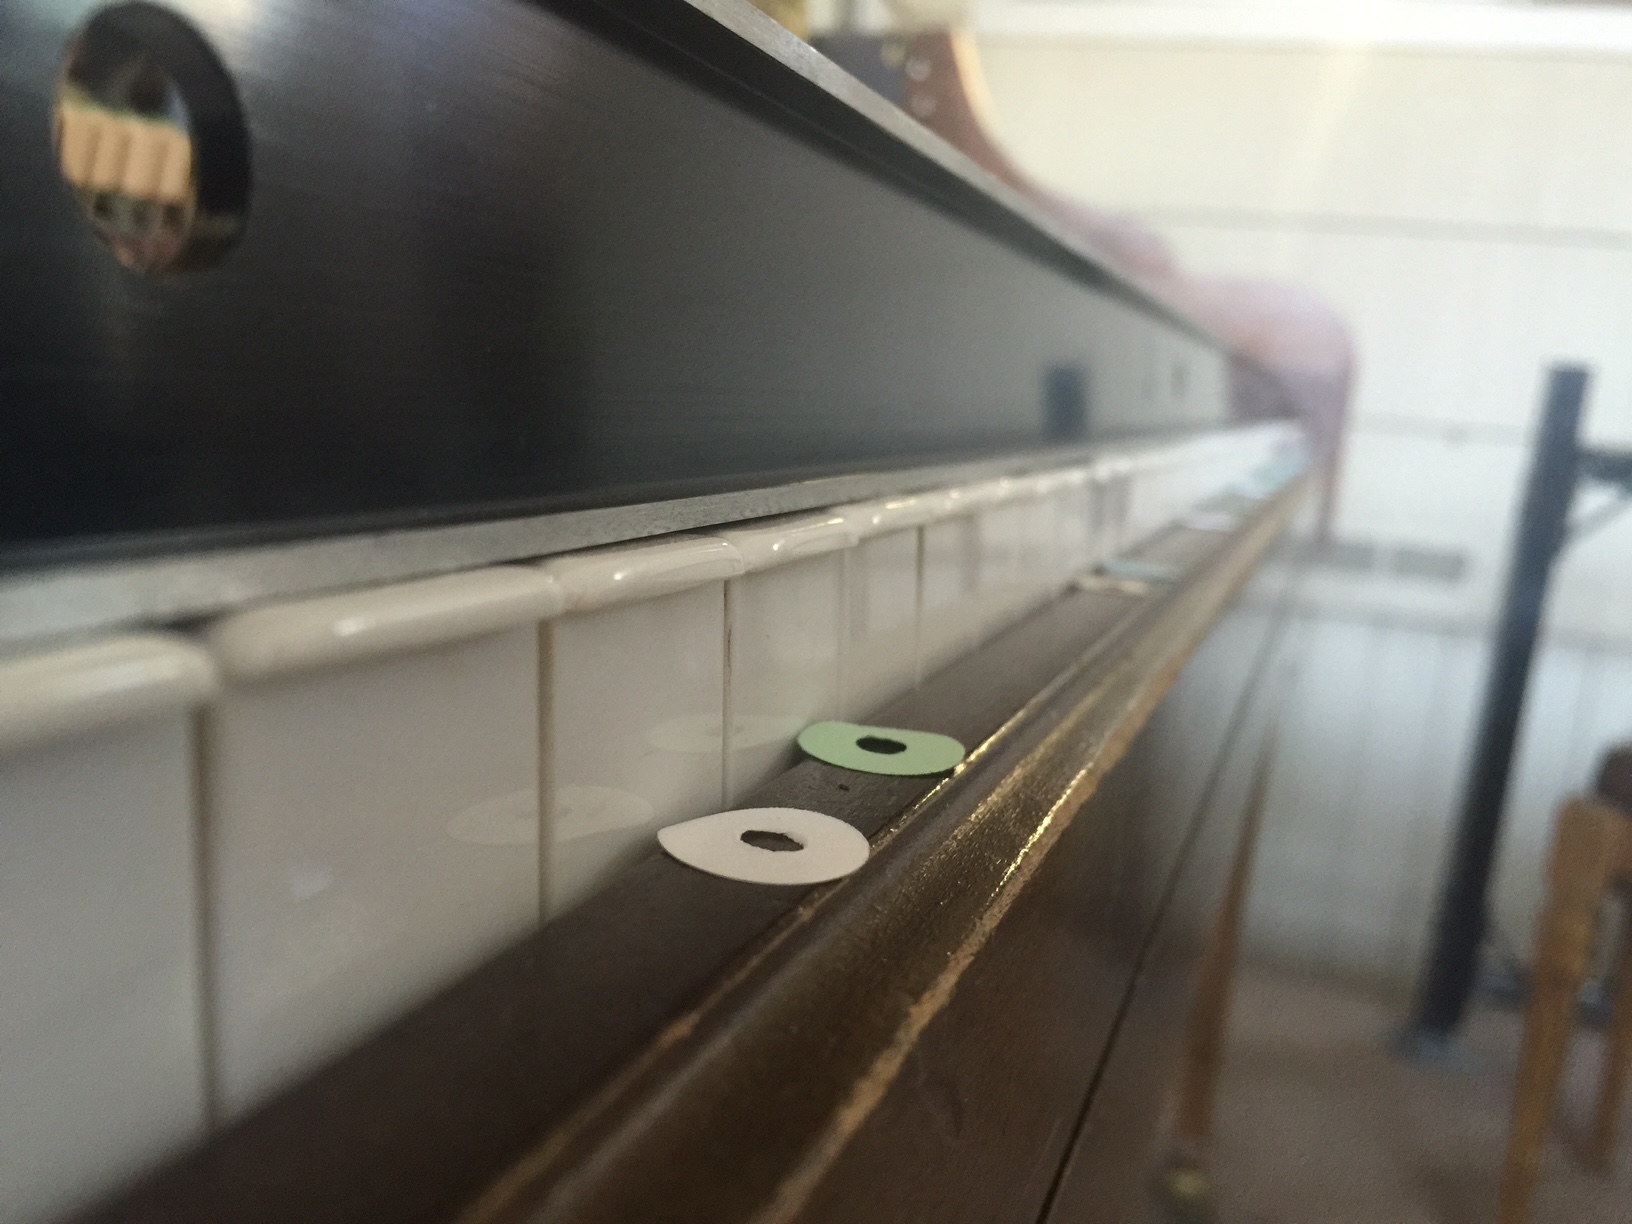
The keys get still more attention! They have to be carefully leveled so each is at the exact same height, and the the “key dip” (how far the key depresses before stopping) has to be set. These are set by putting paper and cardboard punchings of different thicknesses under the key at the balance rail and front rail.

You can see some of these keys (below) need to be raised a little. Having all the keys level and responding the same when playing is essential for real control when playing the piano.

piano key leveling

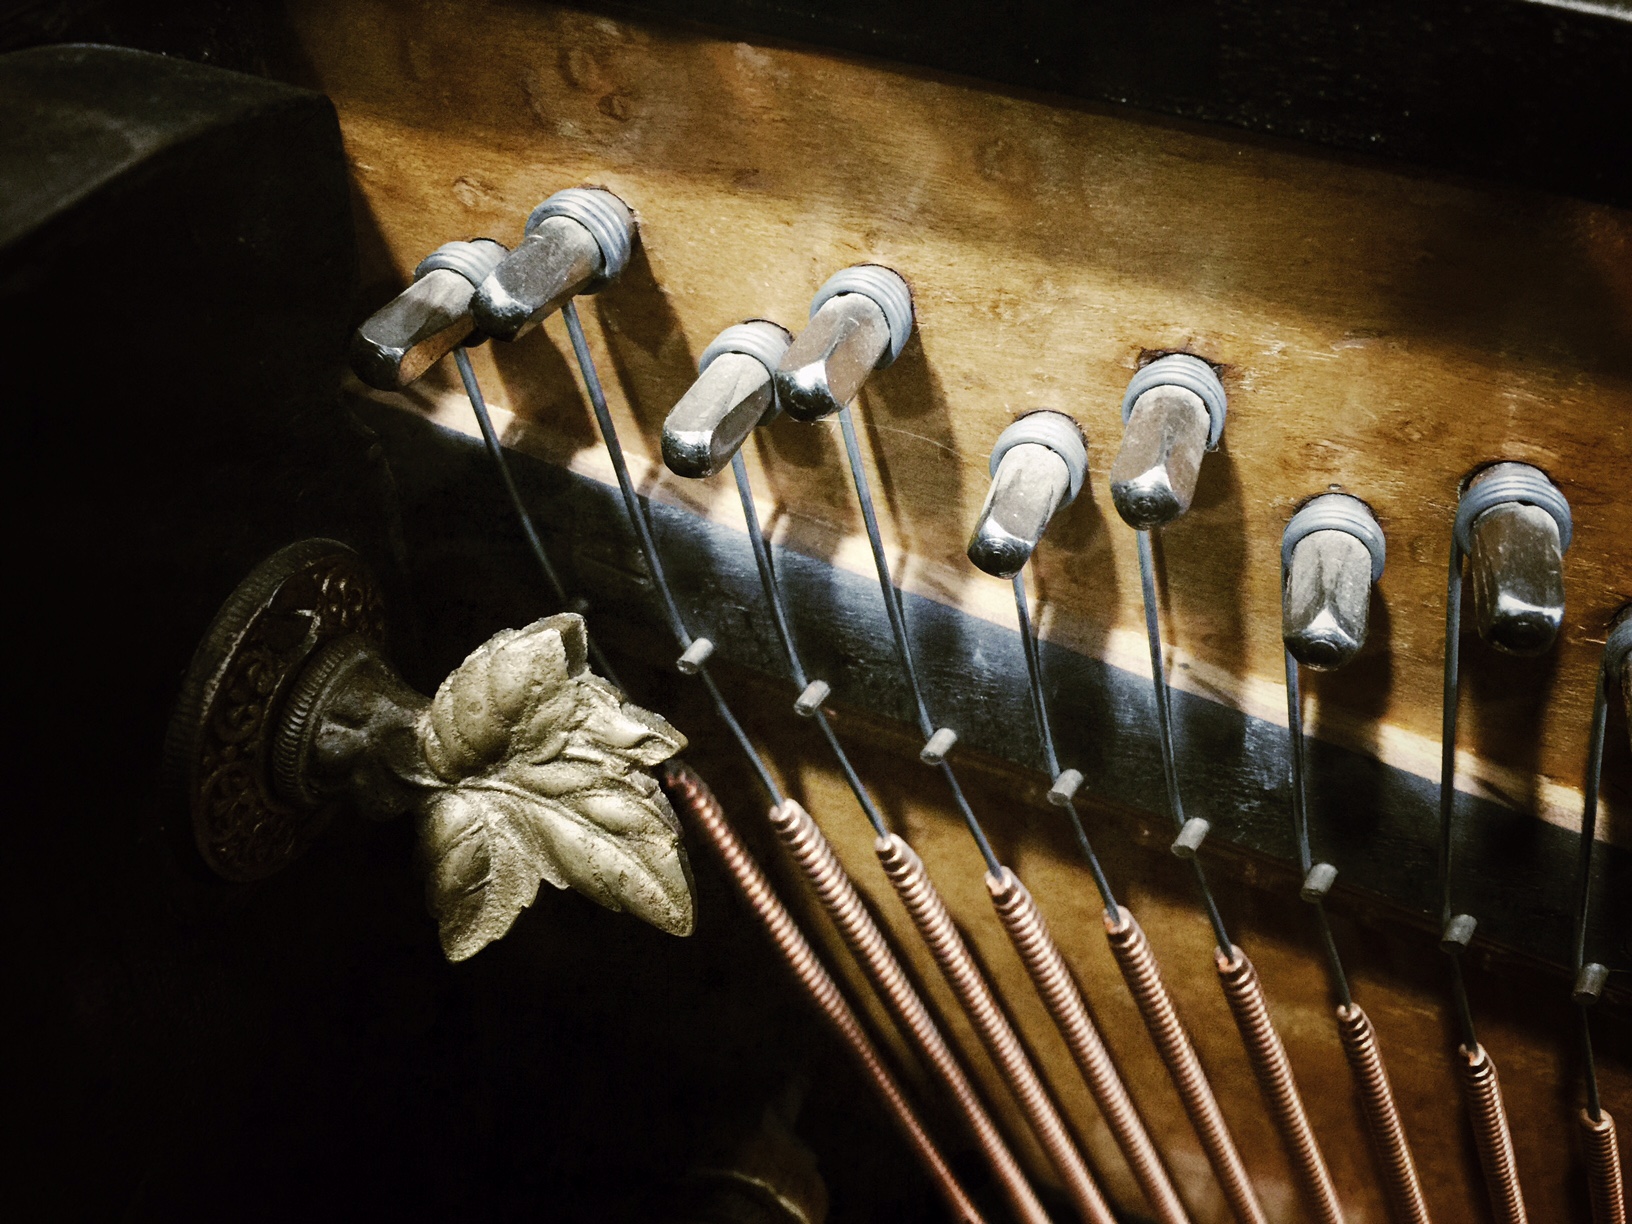
I finally move to the back of the key and adjust the “capstans,” an adjustable metal post which connects the key to the main part of the piano action (whippen and hammer). If this metal post is too low, the hammer will not begin to move right away when the key is depressed, giving a sloppy feel to the action. If the capstan is too high, it will not let all the moving parts reset when the key is let go, and it won’t be ready to play again on the next depression of the key. This makes a huge different on how your piano action feels.

adjusting capstans

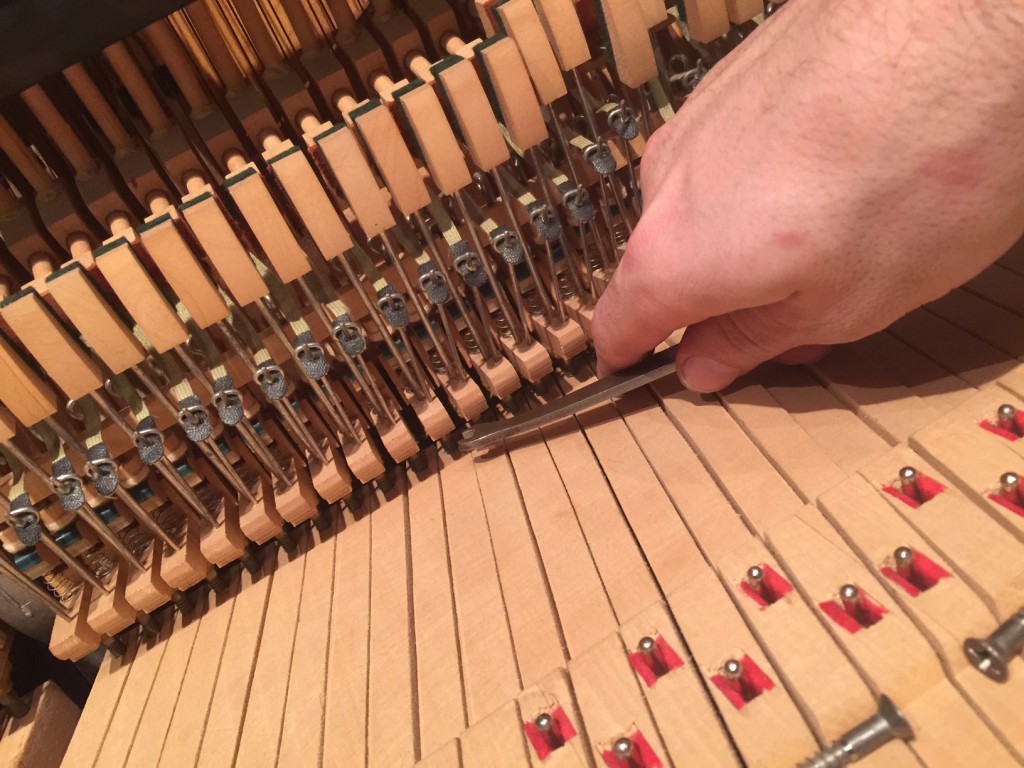
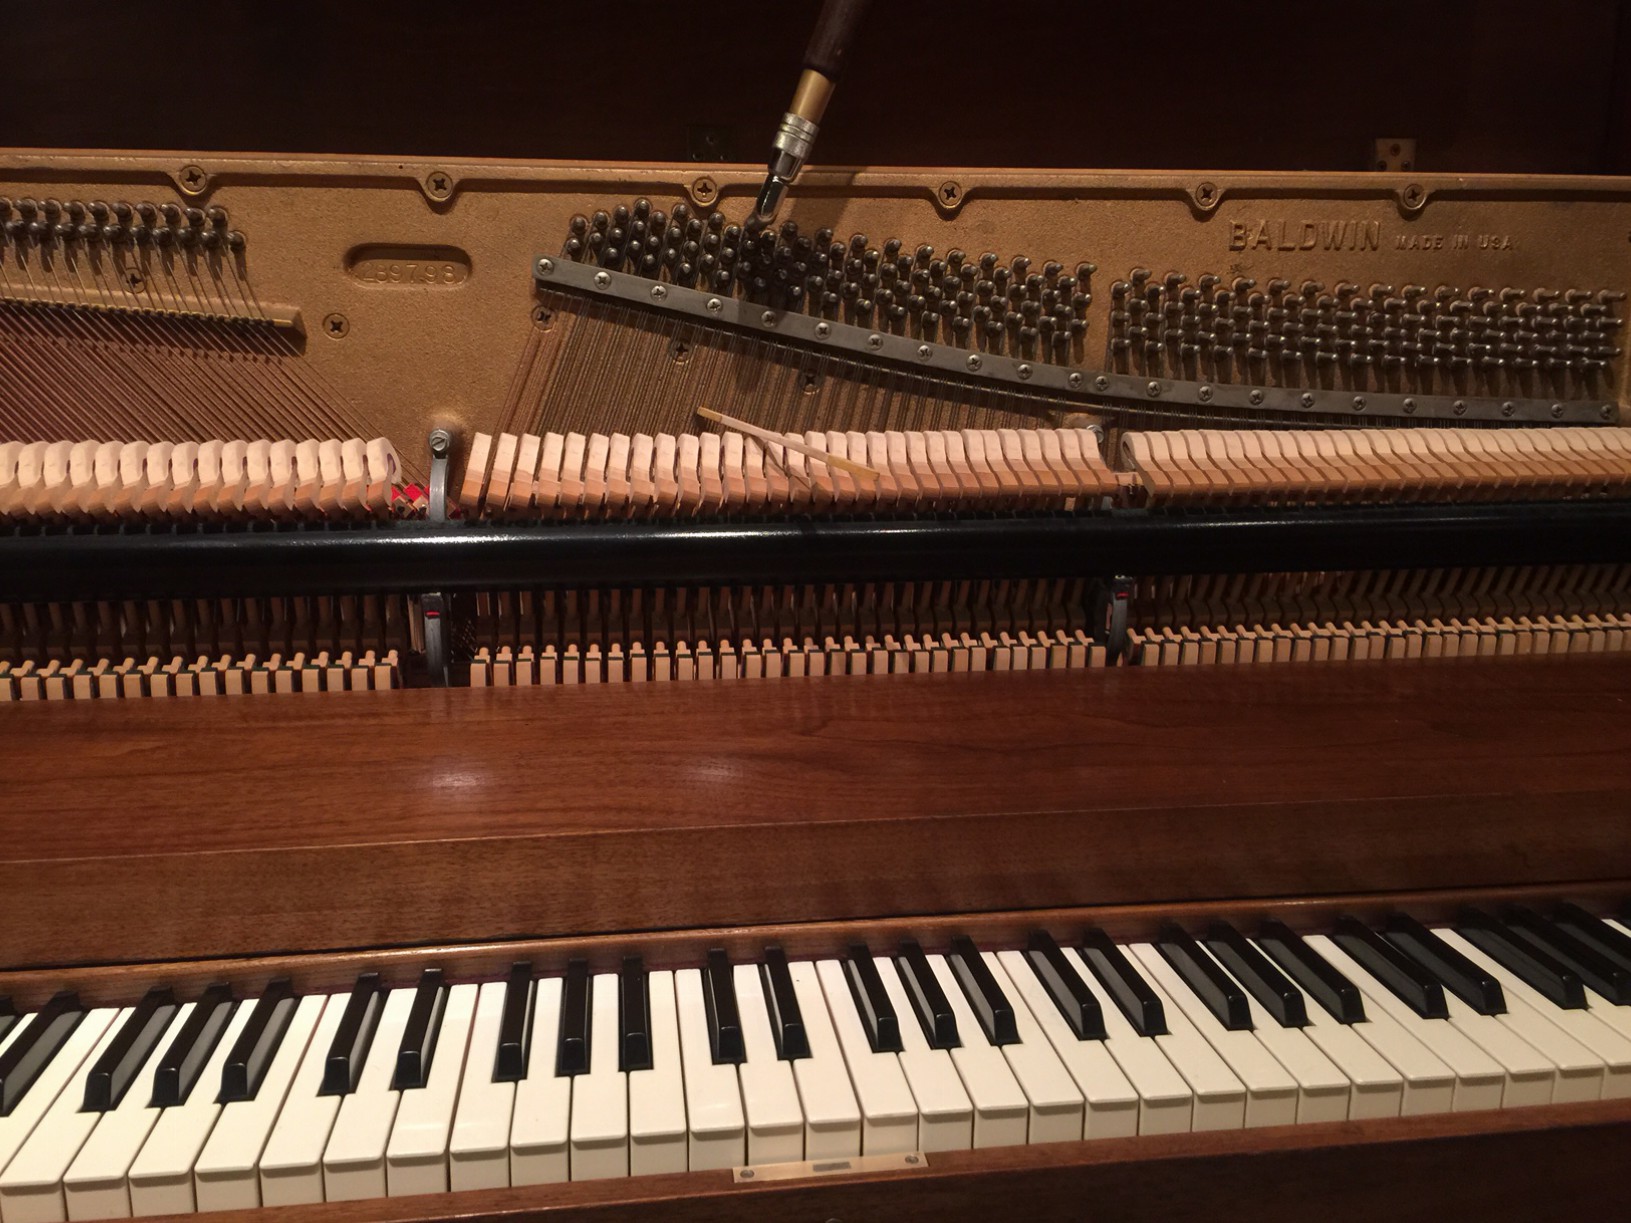
Next I set “let-off.” An essential part of the piano’s action is the “escapement mechanism.” When a key is depressed, it throws the hammer forward towards the string. At the last millisecond, the “jack,” which pushes the hammer forward, stops pushing so that it flies freely towards the string and can bounce off. The string can then vibrate freely. If the jack trips too late, it will push the hard felt hammer right into the string, keeping it from vibrating at all. You will get just a “blat.” No note. It’s like pushing your finger against a guitar string. If the jack trips too soon, the hammer will never reach the string when you play the note softly. Setting the let-off gives you much more dynamic control of your piano.

setting let off

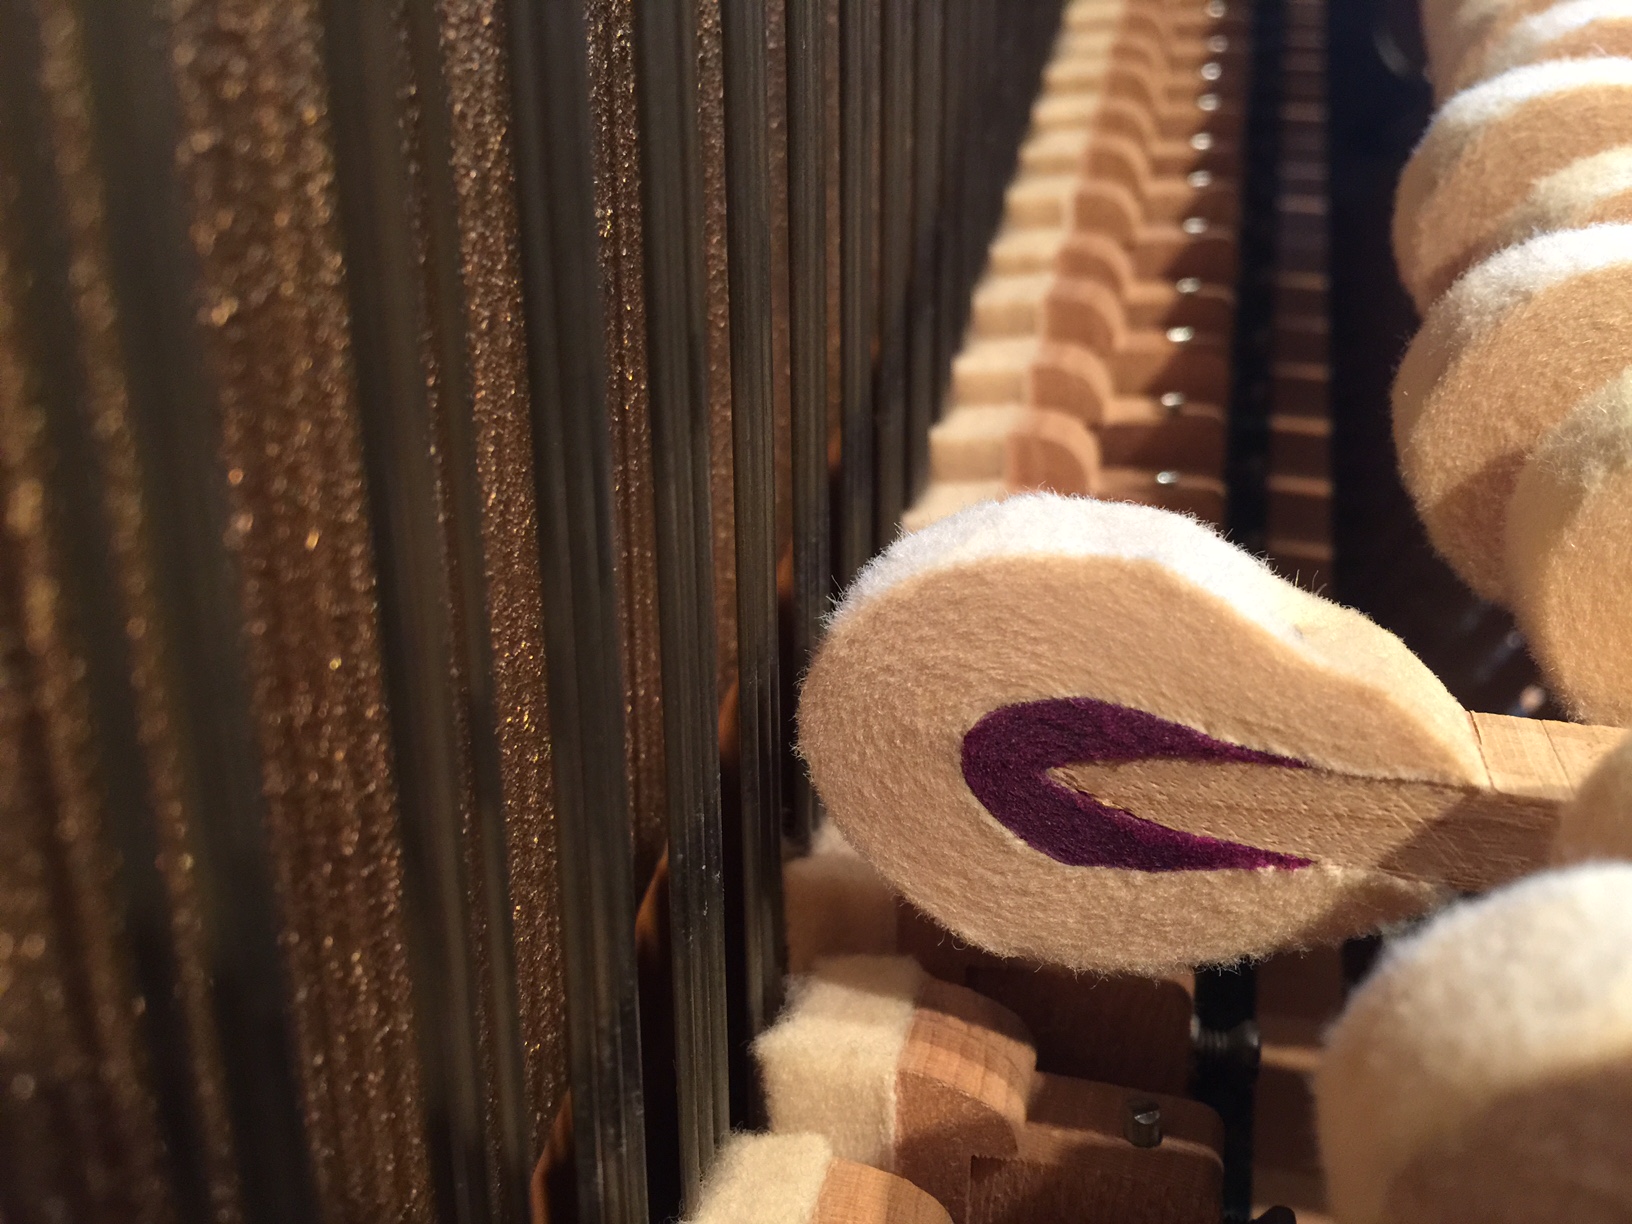
The last part of regulating the action is setting the “hammer checking.” I regulate how far the hammer is able to bounce back when the note is struck. If it bounces too far back, the note will not repeat quickly. If set too close, it could block the hammer against the string on a strong blow.

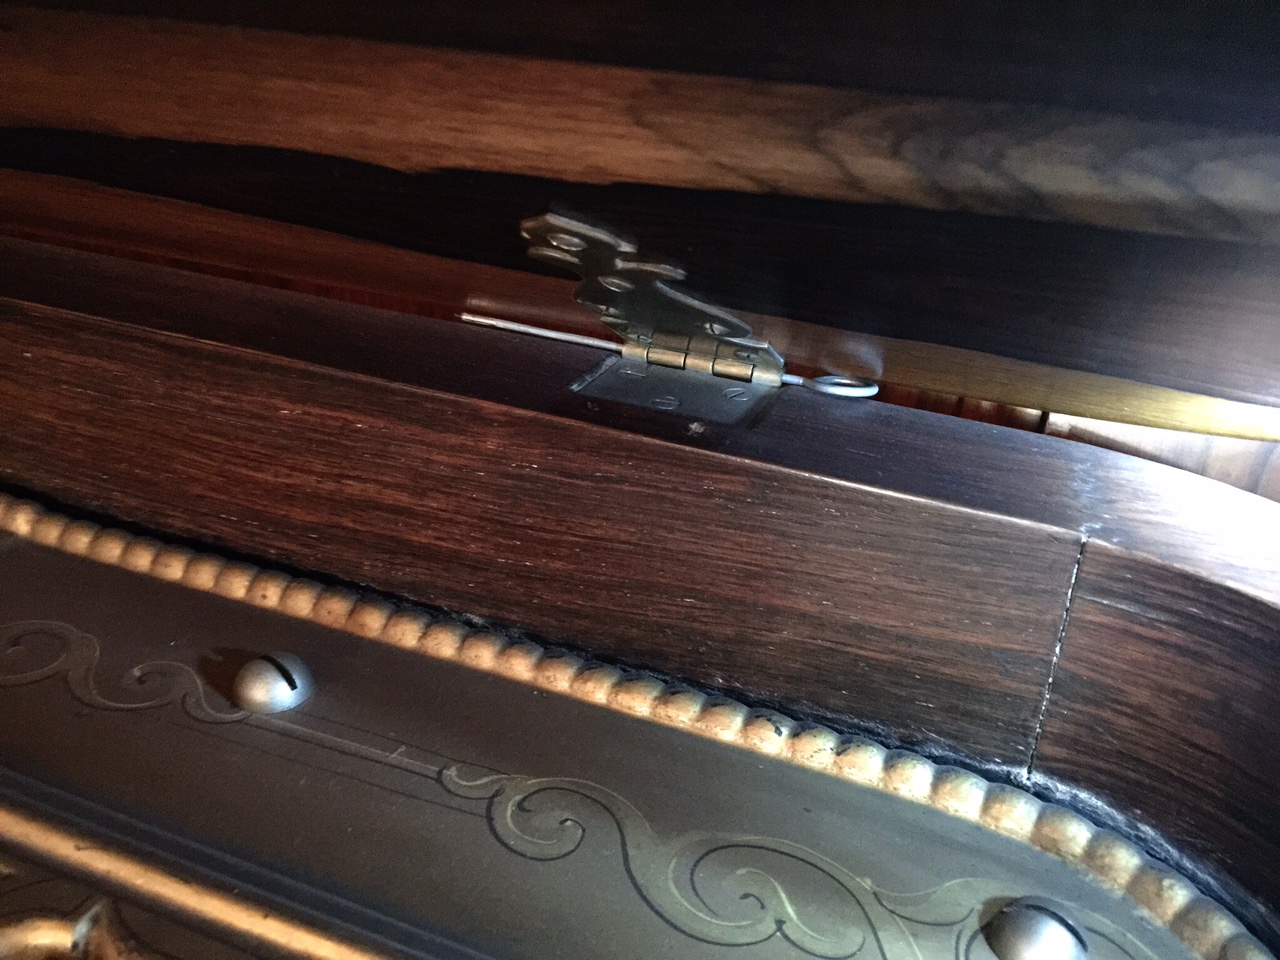
Each “backcheck” is on a metal wire that has to be bent to the correct position.

Regulate backchecks

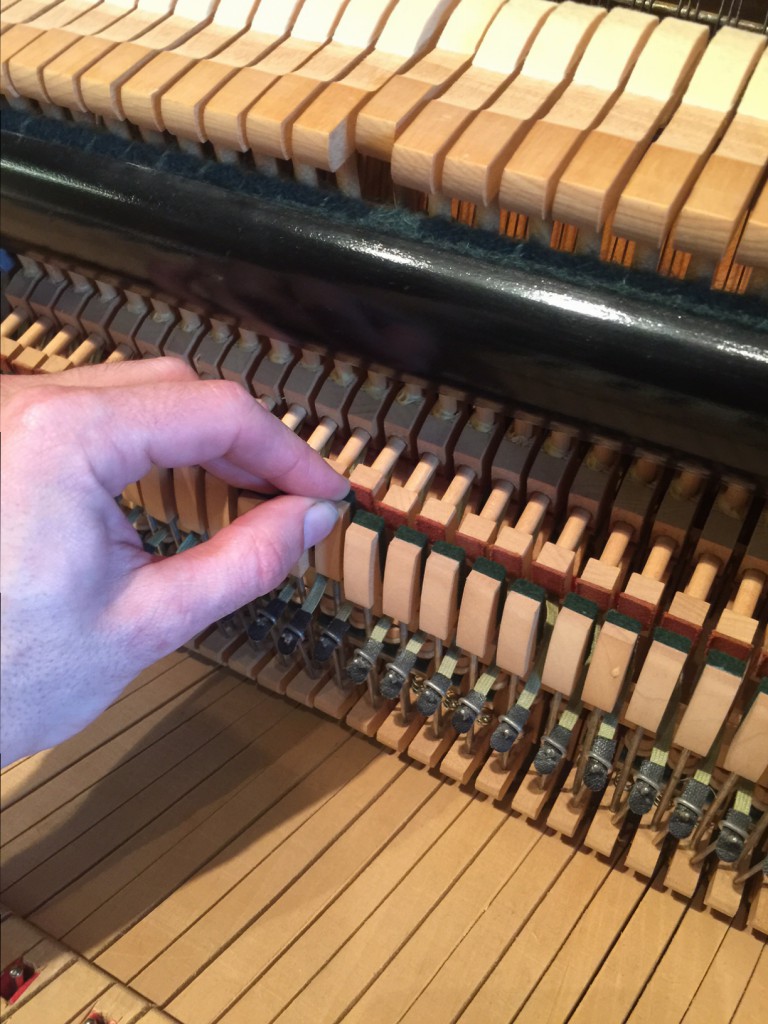
These hammers are all checking evenly and at the correct distance.

regulat checking

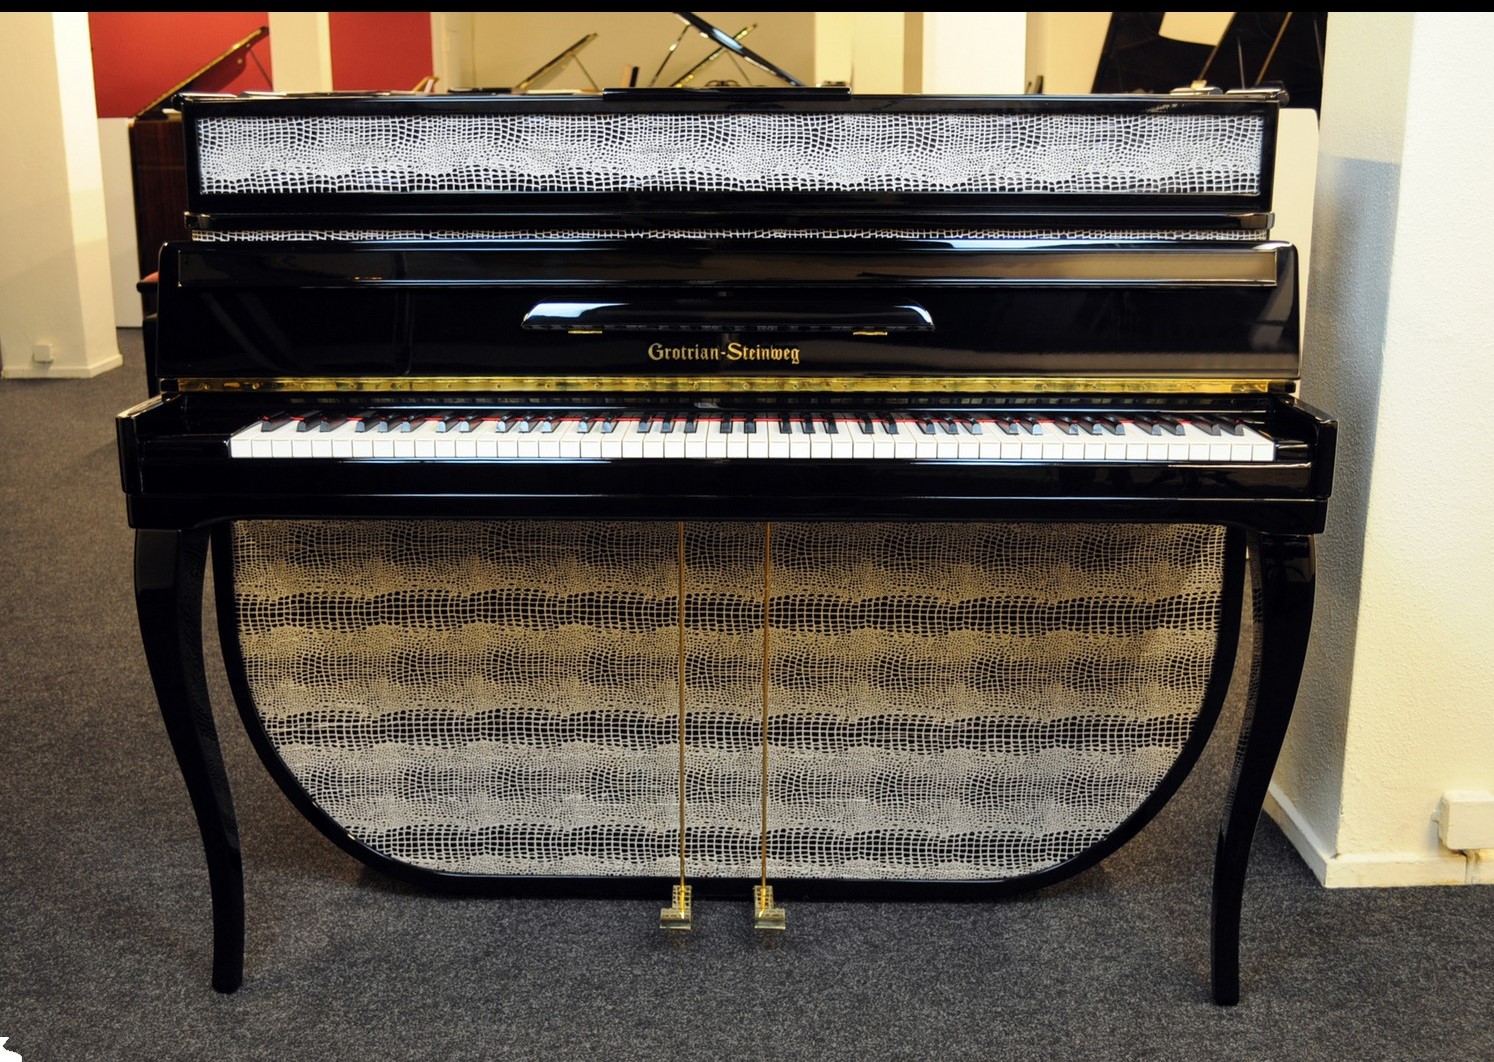
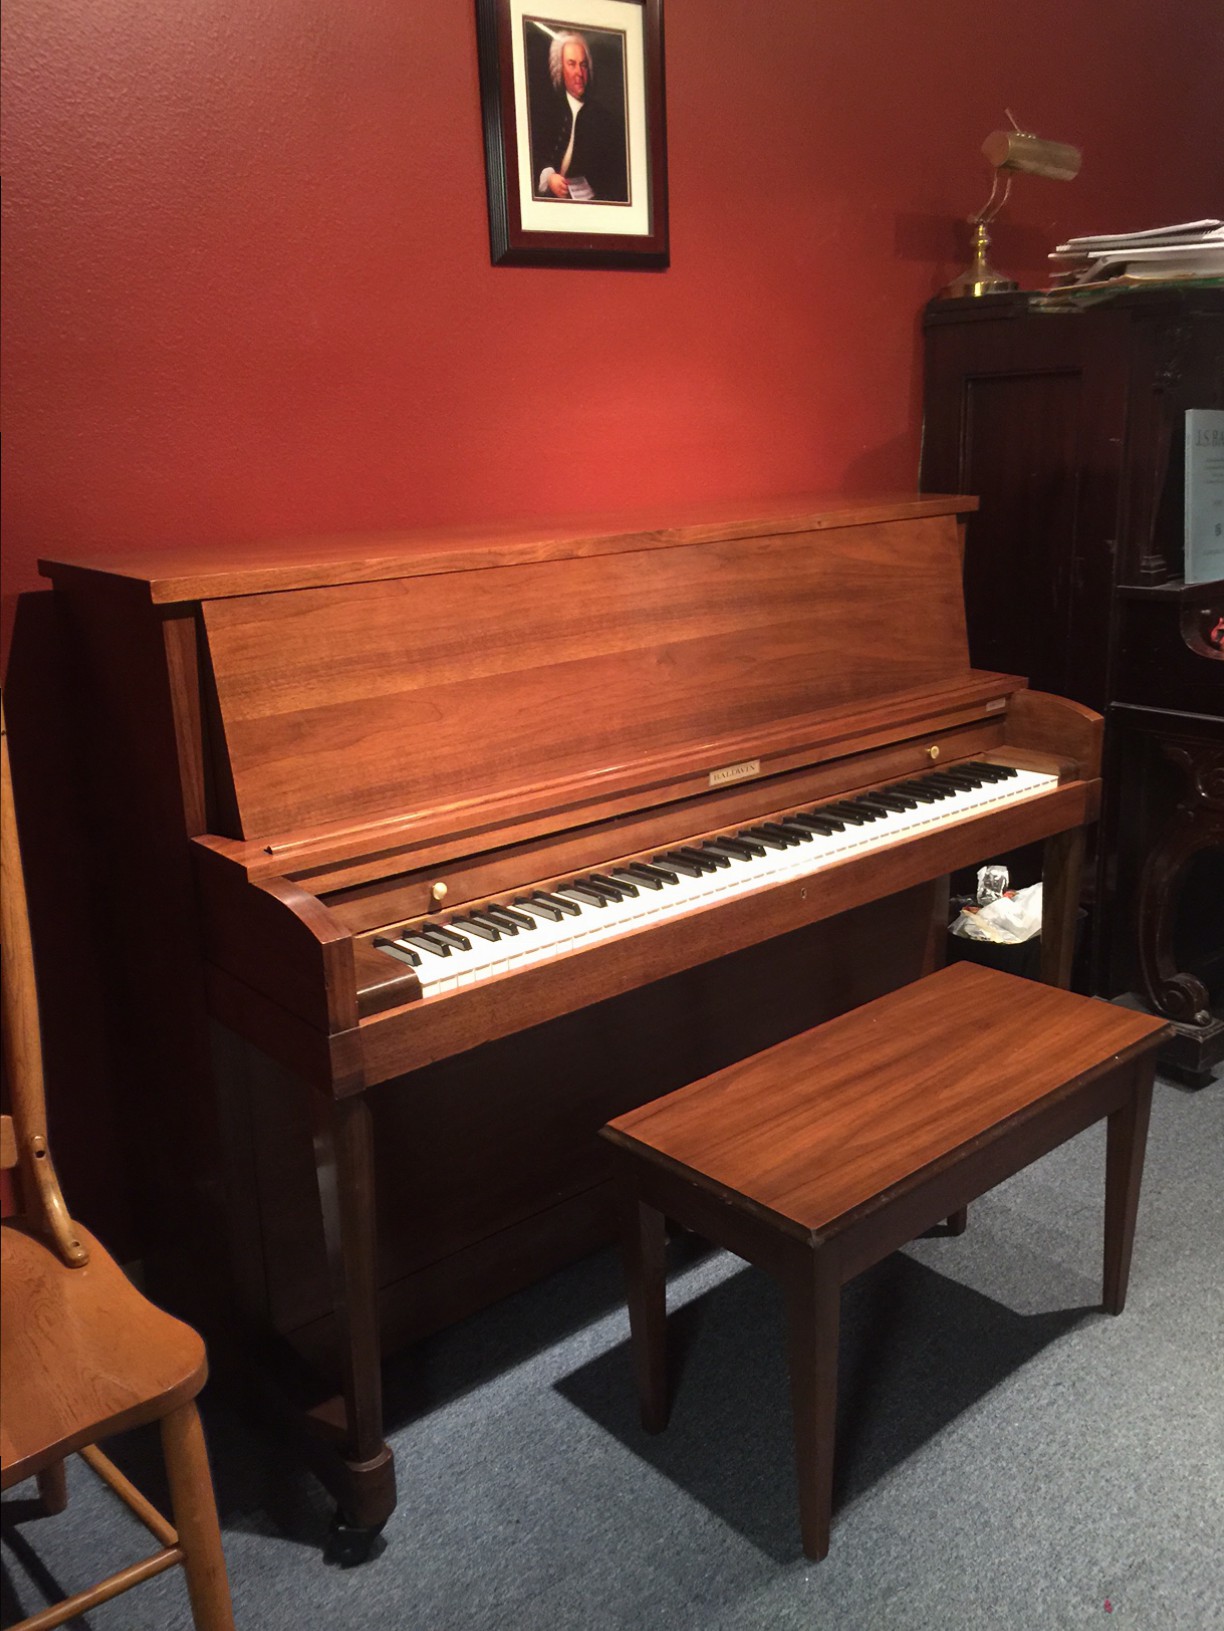
At this point, the piano plays well and I will spend some time on the outside of the piano. I first clean the case parts, then touch up any small chips or scratches that I can. (This is basic touch up. There are several men in Portland that do piano case repair full time. I do small touch up, and not major miracles. The bench in the picture below had been chewed on by a dog. I made it look better, but not perfect.)

case touch up

I will touch up the wood finish on the bench as well as tighten the leg bolts. I also polish any brass pedals, locks, keyholes and knobs that can be shined up.

polish piano brass 2

When the piano case and bench look their best, I finally get to tune the piano! This includes a pitch raise if necessary (if the piano hasn’t been tuned for a long time or has been through drastic climate changes.)

piano tuning

After the piano is finely tuned, I voice the hammers so each produces the same quality of tone. Often some notes will stick out as really bright and noisy, or dull and soft compared to the notes around them. Through a combination of filing and needling different areas of the felt hammer, I even out the tone production throughout the keyboard.

Last I will regulate the pedals (fixing any squeak problems) and put the case parts back on the piano. I’m finally finished. I’m impressed if you made it to this point in this blog post!
This long process will look a little different on every piano I work on, and will include necessary repairs specific to the instrument (broken or missing strings, gluing loose parts etc.).

completed piano

This Complete Upright Piano Service Package usually takes about 6 hours for a well-used, but quality piano. Doing all this work in one visit saves me a lot of time in dismantling the piano and travel, and gives you as the customer more service for your money! If these various jobs were done individually, most piano technicians would charge well over $1,000.

If you know your piano needs a good bit of work, or if it has been getting a lot of use and hasn’t been worked over for a long time, this service could be very beneficial for your piano. Give me a call and I would be happy to schedule a day to come out and give your piano the deluxe treatment.

Please note that this service is for upright pianos. I am not currently offering this type of one-visit service for grands.

1877 Steinway Upright

I recently worked on another old piano and I thought I would share some pictures here.

Steinway upright name

This Steinway upright was built in 1877. The workmanship is beautiful! It has new strings and hammers, but most of the action parts are original.

Steinway upright action

I was there to repair a spring on a bass damper that had finally broken after 127 years of service.
The repair took about 20 minutes, but it took another 45 minutes to solve a mysterious buzzing noise and the pedal squeak.
Steinway upright serial number

This piano cost around $500 in 1877, which is about $18,000 in today’s money. Every detail was beautifully made. Even the screw the held the front panel in place was decorative. The only person who would ever really see this is the piano tuner who takes the piano apart!

Steinway upright pin

Kawai Upright Pianos

While working with pianos in the Portland area I’ve had the opportunity to work with all three of the piano dealers in town, Classic Pianos, Michelle’s Pianos, Portland Piano Company. One of the great things about working with dealers is the opportunity to really get to know and understand the different piano builders. I’ve now worked with new Yamaha, Steinway (Boston and Essex as well), Grotrian, Young Chang, Bosendorfer, Mason & Hamlin, Fazioli, and Kawai pianos through dealers. At the dealer I see them right “out of the box” from the factory. I get a chance to work with enough of them together I get to learn each piano’s strengths, weaknesses, and eccentricities.

A K15, or "Hobbit Piano"

A K15, or “Hobbit Piano”

Portland Piano Company has been representing Kawai now for about a year so I’ve been able to work with a lot of Kawai pianos! Here are some of my observations on these excellent pianos.
Kawai is a Japanese company that has been making fine pianos since 1927. They are based in Hamamatsu, Japan. Most of their pianos are made there, but they do build some of their more affordable models in Indonesia. Kawai has always been known for their innovative approach to piano building, specifically in the material they use for parts in their instruments.

They have a wide variety of instruments to choose from. On the smaller end they offer a 44″ tall Indonesian-made upright and on the other end of the spectrum they offer the Shigeru Kawai concert grand, a beautiful 9’1″, 1100lb piano handcrafted in Japan. Kawai makes a piano for every space and price range.

Kawai K-200

Kawai K-200

Kawai’s smaller model uprights include the K-15 (I call it a hobbit piano), 506N (a sturdy piano with good wheels often used in schools), and the “professional models” K-200 and K-300. These are their entry level pianos with affordable price points. These pianos compare well with other pianos in their class. They tend to be mellow pianos (true of most Kawais in my opinion) with a responsive touch and pleasant tone. They are much gentler pianos than Yamaha’s equivalent, the T118, or their Cable-Nelson brand of pianos, and the action seems a little faster. The tone quality is clear, pleasant, and interesting but not aggressive. Steinway’s line of Essex pianos is priced similarly but I think the tone quality is better here in the Kawai. The Essex sound is very clear but almost boring. The bass range in these smaller Kawai uprights is not particularly strong, as in most short pianos.


k-400

Kawai makes even taller K-500’s and K-800’s but I haven’t had a chance to work with these yet.

Tuning stability is good and while the Yamaha professional uprights are easier to tune than Kawais, I don’t think either has the edge when it comes to the stability and longevity of a good tuning.

New pianos will need to be tuned at least twice a year for the first year or two, and then every 6-12 months after that.

Visually and aesthetically, the Kawai is classic and has nice lines. The polished ebony finish is the lowest priced finish, and is durable and never goes out of style. It shows fingerprints, but is easy to clean and maintain. They also offer satin black, satin mahogany and walnut and a white polish finish on some of their models.

In summary here are my simple pros and cons for the Kawai uprights in order of importance.
Pros:
1. Good value for price.
2. Fast and responsive touch.
3. Solid, mellow, and interesting tone.
4. Easy to play and control.
5. Good tuning stability.
6. Consistent construction means very few problems/sticking keys.

Cons:
1. Mellow tone makes it hard to get huge sound when needed.
2. Harder to tune than some pianos.
3. That’s all I can think of…

“What is a Piano”

I’m posting a link here to a blog post over on Portland Piano Company‘s website.
Here is a teaser quote from their post “What is a Piano?” You can read their article here.

“The two main requirements of a piano action are that it must multiply the power of a person’s fingers to strike the strings and the hammer must fall back off the string slightly after the strike so that it does not mute the string. Otherwise, the instrument would be called a pianomuffle instead of a pianoforte. ”

What is a piano

Tuning a Square Grand Piano

There are upright pianos, there are grand pianos, then there are square pianos. They were made from the late 18th century through the 1890’s.

1892 Kranich & Bach Square Grand

1892 Kranich & Bach Square Grand


They are beautiful looking instruments, but they are very different than the modern piano. There are less keys, there are only 2 strings per note through the upper range instead of 3, the tension on the strings isn’t as high, the hammers are much thinner and lighter, and most challenging for me, the tuning pins are in the back of the piano instead of the front like the grand piano’s.
There aren’t very many square grands on this side of the states so I don’t get many inquiries about them. I have received several calls from people excited about a “really cool, old square piano that they found pretty cheap” and they want to know if it is worth a lot. They actually aren’t worth very much as instruments, just because the design isn’t nearly as good as the modern grand or upright. But someone recently called asking me to tune their square piano that came with their house. Many piano technicians won’t tune them, but I hadn’t ever done it, so I decided I would help them out and give it a try.
IMG_0094
I took a few minutes exploring the piano when I got there. I almost damaged the wall behind the piano when I went to open the lid (about 80 or 90lbs of beautiful Brazilian rosewood) and one of the hinge pins was missing so the lid started to slide off the piano!
Snapseed
I took apart one of my mutes and used the metal rod as a hinge pin while I worked (I have since ordered a wide variety of hinges and pins so I can easily fix issues like that).
Next I had to take parts off the piano until I could actually get to the tuning pins to start tuning. The music rack was screwed in (unlike modern grands), so I took that off. Then I had to dismantle part of the damper system for the bass strings which was covering the tuning pin in the back of the piano. I measured the pitch throughout the piano and it was very flat. Going off what I knew of the piano and my customer, I decided it would be best to play it safe and tune it at a pitch lower than modern A440 in an effort to not break strings (I talked to another tuner later that week and he said he broke 20 strings on the only square grand he ever tried to tune). My post on deciding what pitch to use on older pianos can be found here.
I got to work tuning and it went well! The strings didn’t move very smoothly, so it took several tries on most of the strings to actually get them into tune, but it sounded pretty good when I was finished! Since the tuning pins are in the back, I had to stand, bent 80 degrees at the waist for the full 90 minutes tuning, which was pretty brutal on my back. I kept taking little breaks and lying flat on the floor to rest my back.TuningSquareGrand
The middle section of the piano actually tuned faster than usual because there was only two strings per note instead of the three unison strings found in modern pianos. The highest section of the piano actually had three per note, which is unusual for square grands. The highest section was the hardest and my back was really tired at that point!
I spent about 90 minutes tuning, then played a couple pieces. The touch felt considerably different. The keyboard is actually shorter with 15-20 less keys. The keys themselves are physically smaller, both shorter and narrower than our modern piano keys. They weren’t as narrow as a harpsichord or fortepiano, but they did feel different.
I finished up by replacing a couple tight parts in the damper system that were malfunctioning. By this time in the evening, my customers’ young daughters had come home from school and were very interested in what I was doing. I had to be careful where I set these antique parts as I was working!
The piano played a little heavier than most pianos, but decently. The sound wasn’t as brilliant as we are used to (due to less strings, thinner strings, and lower tension on the strings), but it was pleasing. My customer was happy with an in-tune, well functioning piano when I was done, which is always my goal!
Working the square piano is harder than usual, and I did have to charge a little more than my normal tuning fee, but it wasn’t near the horrible job some piano technicians make it out to be. I would be happy to do it again and I hope I get more chances to work with these interesting instruments.

Tuning for the Portland Tree Lighting

The day after Thanksgiving I had the dubious honor of tuning the piano onstage for the tree lighting festivities at Pioneer Courthouse Square. This kind of events is always an interesting experience with lots of unknown factors for me as the piano’s caretaker.
The first disadvantage for this kind of event is the weather. Any outside event is going to present a tuning challenge. If it is cold or hot, or humid or dry, the piano will throw a fit and go way out of tune and in most cases, keep going out of tune as fast as I can tune it! This event was cold. High 30’s I think. And it was also wet! I had rain blowing in on me while I was tuning and even hitting the piano occasionally!
The next disadvantage for event tunings is you never know how much time you will have. I got there early and the performing group was warming up and testing the sound system. I was supposed to tune at 4:30 and they were still singing when 4:30 came and went. When I got on stage and started to tune, I overheard the group’s director talking with the TV newsman and learned I only had about 15 minutes to work! It normally takes about an hour to tune a piano in the best of conditions!

7' Steinway B tucked in on the left. the NW Community Gospel Choir onstage.

7′ Steinway B tucked in on the left. the NW Community Gospel Choir onstage.


You also never know what the background sound level will be when tuning for an event. I’ve tuned over sound checks, white noise (the worst), or even pressure washers! In this case the newsman was riling up the crowd and making them scream getting ready for his clip he was going to take in a few minutes. The bass player made eye contact with me and just shook his head.
So I had 15 minutes, the environment was horrible for the piano, and I could hardly hear to tune over the high noise level!
I just had to stick my head down inside this poor Steinway and work through the piano, tuning the worst notes until I ran out of time. In this kind of scenario, if they haven’t planned well for the tuner, I just have to do the best I can with the hand I get dealt! The piano sounded decent when I was done, but certainly wasn’t perfect. But, even if I had done a perfect tuning, within 20 minutes, there would have been notes out of tune just because of the cold!
Oh well. It was an adventure.


This video was from last year’s ceremony, but Pink Martini performed this year as well. I hope the piano sounded good for them!